What is Python?
Python is a widely-used, interpreted, object-oriented, and high-level programming language with dynamic semantics, used for general-purpose programming.
And while you may know the python as a large snake, the name of the Python programming language comes from an old BBC television comedy sketch series called Monty Python's Flying Circus.
At the height of its success, the Monty Python team were performing their sketches to live audiences across the world, including at the Hollywood Bowl.
Since Monty Python is considered one of the two fundamental nutrients to a programmer (the other being pizza), Python's creator named the language in honor of the TV show.
Who created Python?
One of the amazing features of Python is the fact that it is actually one person's work. Usually, new programming languages are developed and published by large companies employing lots of professionals, and due to copyright rules, it is very hard to name any of the people involved in the project. Python is an exception.
There are not many languages whose authors are known by name. Python was created by Guido van Rossum, born in 1956 in Haarlem, the Netherlands. Of course, Guido van Rossum did not develop and evolve all the Python components himself.
The speed with which Python has spread around the world is a result of the continuous work of thousands (very often anonymous) programmers, testers, users (many of them aren't IT specialists) and enthusiasts, but it must be said that the very first idea (the seed from which Python sprouted) came to one head - Guido's.
The circumstances in which Python was created are a bit puzzling. According to Guido van Rossum:
In December 1989, I was looking for a "hobby" programming project that would keep me occupied during the week around Christmas. My office (...) would be closed, but I had a home computer, and not much else on my hands. I decided to write an interpreter for the new scripting language I had been thinking about lately: a descendant of ABC that would appeal to Unix/C hackers. I chose Python as a working title for the project, being in a slightly irreverent mood (and a big fan of Monty Python's Flying Circus).Guido van Rossum
Python goals
In 1999, Guido van Rossum defined his goals for Python:
- an easy and intuitive language just as powerful as those of the major competitors;
- open source, so anyone can contribute to its development;
- code that is as understandable as plain English;
- suitable for everyday tasks, allowing for short development times.
About 20 years later, it is clear that all these intentions have been fulfilled. Some sources say that Python is the most popular programming language in the world, while others claim it's the third or the fifth.
Either way, it still occupies a high rank in the top ten of the PYPL PopularitY of Programming Language and the TIOBE Programming Community Index.
Python isn't a young language. It is mature and trustworthy. It's not a one-hit wonder. It's a bright star in the programming firmament, and time spent learning Python is a very good investment
There are many reasons - we've listed some of them already, but let's enumerate them again in a more practical manner:
- it's easy to learn - the time needed to learn Python is shorter than for many other languages; this means that it's possible to start the actual programming faster;
- it's easy to teach - the teaching workload is smaller than that needed by other languages; this means that the teacher can put more emphasis on general (language-independent) programming techniques, not wasting energy on exotic tricks, strange exceptions and incomprehensible rules;
- it's easy to use for writing new software - it's often possible to write code faster when using Python;
- it's easy to understand - it's also often easier to understand someone else's code faster if it is written in Python;
- it's easy to obtain, install and deploy - Python is free, open and multiplatform; not all languages can boast that.
Of course, Python has its drawbacks, too:
- it's not a speed demon - Python does not deliver exceptional performance;
- in some cases it may be resistant to some simpler testing techniques - this may mean that debugging Python's code can be more difficult than with other languages; fortunately, making mistakes is always harder in Python.
Why not Python?
Despite Python's growing popularity, there are still some niches where Python is absent, or is rarely seen:
- low-level programming (sometimes called "close to metal" programming): if you want to implement an extremely effective driver or graphical engine, you wouldn't use Python;
- applications for mobile devices: although this territory is still waiting to be conquered by Python, it will most likely happen someday.
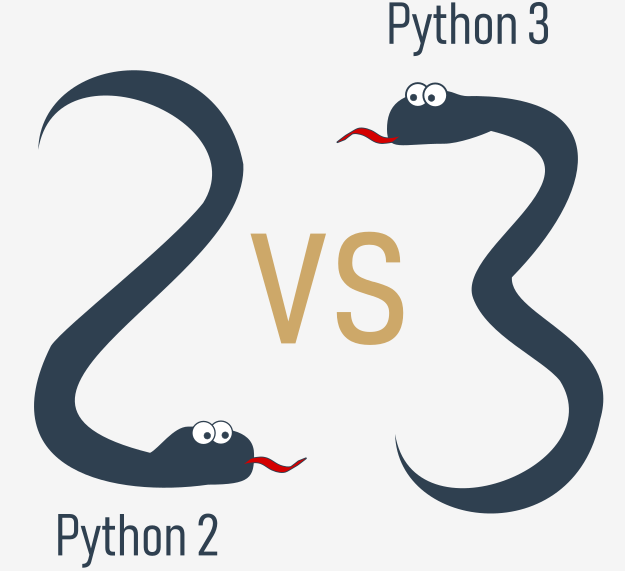
There is more than one Python
There are two main kinds of Python, called Python 2 and Python 3.
Python 2 is an older version of the original Python. Its development has since been intentionally stalled, although that doesn't mean that there are no updates to it. On the contrary, the updates are issued on a regular basis, but they are not intended to modify the language in any significant way. They rather fix any freshly discovered bugs and security holes. Python 2's development path has reached a dead end already, but Python 2 itself is still very much alive.
Python 3 is the newer (to be precise, the current) version of the language. It's going through its own evolution path, creating its own standards and habits.
The former is more traditional, more conservative than Python, and resembles some of the good old languages derived from the classic C programming language.
These two versions of Python aren't compatible with each other. Python 2 scripts won't run in a Python 3 environment and vice versa, so if you want the old Python 2 code to be run by a Python 3 interpreter, the only possible solution is to rewrite it, not from scratch, of course, as large parts of the code may remain untouched, but you do have to revise all the code to find all possible incompatibilities. Unfortunately, this process cannot be fully automatized.
It's too hard, too time-consuming, too expensive, and too risky to migrate an old Python 2 application to a new platform. It's possible that rewriting the code will introduce new bugs to it. It's easier and more sensible to leave these systems alone and to improve the existing interpreter, instead of trying to work inside the already functioning source code.
Python 3 isn't just a better version of Python 2 - it is a completely different language, although it's very similar to its predecessor. When you look at them from a distance, they appear to be the same, but when you look closely, though, you notice a lot of differences.
Cython
Another Python family member is Cython.
Cython is one of a possible number of solutions to the most painful of Python's trait - the lack of efficiency. Large and complex mathematical calculations may be easily coded in Python (much easier than in "C" or any other traditional language), but the resulting code's execution may be extremely time-consuming.
How are these two contradictions reconciled? One solution is to write your mathematical ideas using Python, and when you're absolutely sure that your code is correct and produces valid results, you can translate it into "C". Certainly, "C" will run much faster than pure Python.
This is what Cython is intended to do - to automatically translate the Python code (clean and clear, but not too swift) into "C" code (complicated and talkative, but agile).
Jython
Another version of Python is called Jython.
"J" is for "Java". Imagine a Python written in Java instead of C. This is useful, for example, if you develop large and complex systems written entirely in Java and want to add some Python flexibility to them. The traditional CPython may be difficult to integrate into such an environment, as C and Java live in completely different worlds and don't share many common ideas.
Jython can communicate with existing Java infrastructure more effectively. This is why some projects find it usable and needful.
Note: the current Jython implementation follows Python 2 standards. There is no Jython conforming to Python 3, so far.
PyPy and RPython
Take a look at the logo below. It's a rebus. Can you solve it?
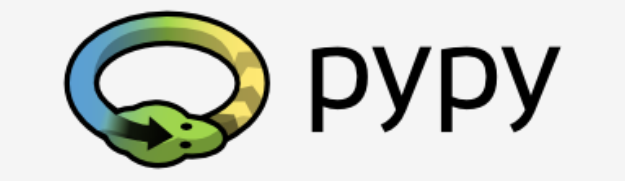
It's a logo of the PyPy - a Python within a Python. In other words, it represents a Python environment written in Python-like language named RPython (Restricted Python). It is actually a subset of Python. The source code of PyPy is not run in the interpretation manner, but is instead translated into the C programming language and then executed separately.
This is useful because if you want to test any new feature that may be (but doesn't have to be) introduced into mainstream Python implementation, it's easier to check it with PyPy than with CPython. This is why PyPy is rather a tool for people developing Python than for the rest of the users.
This doesn't make PyPy any less important or less serious than CPython, of course.
In addition, PyPy is compatible with the Python 3 language.i
How to get Python and how to get to use it
There are several ways to get your own copy of Python 3, depending on the operating system you use.
Linux users most probably have Python already installed - this is the most likely scenario, as Python's infrastructure is intensively used by many Linux OS components.
For example, some distributors may couple their specific tools together with the system and many of these tools, like package managers, are often written in Python. Some parts of graphical environments available in the Linux world may use Python, too.
If you're a Linux user, open the terminal/console, and type:
python3
at the shell prompt, press Enter and wait.
If you see something like this:
Python 3.4.5 (default, Jan 12 2017, 02:28:40)
[GCC 4.2.1 Compatible Clang 3.7.1 (tags/RELEASE_371/final)] on linux
Type "help", "copyright", "credits" or "license" for more information.
>>>
then you don't have to do anything else.
If Python 3 is absent, then refer to your Linux documentation in order to find how to use your package manager to download and install a new package - the one you need is named python3 or its name begins with that.
Downloading and installing Python
Because the browser tells the site you've entered the OS you use, the only step you have to take is to click the appropriate Python version you want.
In this case, select Python 3. The site always offers you the latest version of it.
If you're a Windows user, start the downloaded .exe file and follow all the steps.
Leave the default settings the installer suggests for now, with one exception - look at the checkbox named Add Python 3.x to PATH and check it.
This will make things easier.
If you're a macOS user, a version of Python 2 may already have been preinstalled on your computer, but since we will be working with Python 3, you will still need to download and install the relevant .pkg file from the Python site.

Starting your work with Python
Now that you have Python 3 installed, it's time to check if it works and make the very first use of it.
This will be a very simple procedure, but it should be enough to convince you that the Python environment is complete and functional.
There are many ways of utilizing Python, especially if you're going to be a Python developer.
To start your work, you need the following tools:
- an editor which will support you in writing the code (it should have some special features, not available in simple tools); this dedicated editor will give you more than the standard OS equipment;
- a console in which you can launch your newly written code and stop it forcibly when it gets out of control;
- a tool named a debugger, able to launch your code step by step and allowing you to inspect it at each moment of execution.
Besides its many useful components, the Python 3 standard installation contains a very simple but extremely useful application named IDLE.
IDLE is an acronym: Integrated Development and Learning Environment.
How to write and run your very first program
It is now time to write and run your first Python 3 program. It will be very simple, for now.
The first step is to create a new source file and fill it with code. Click File in the IDLE’s menu and choose New file.
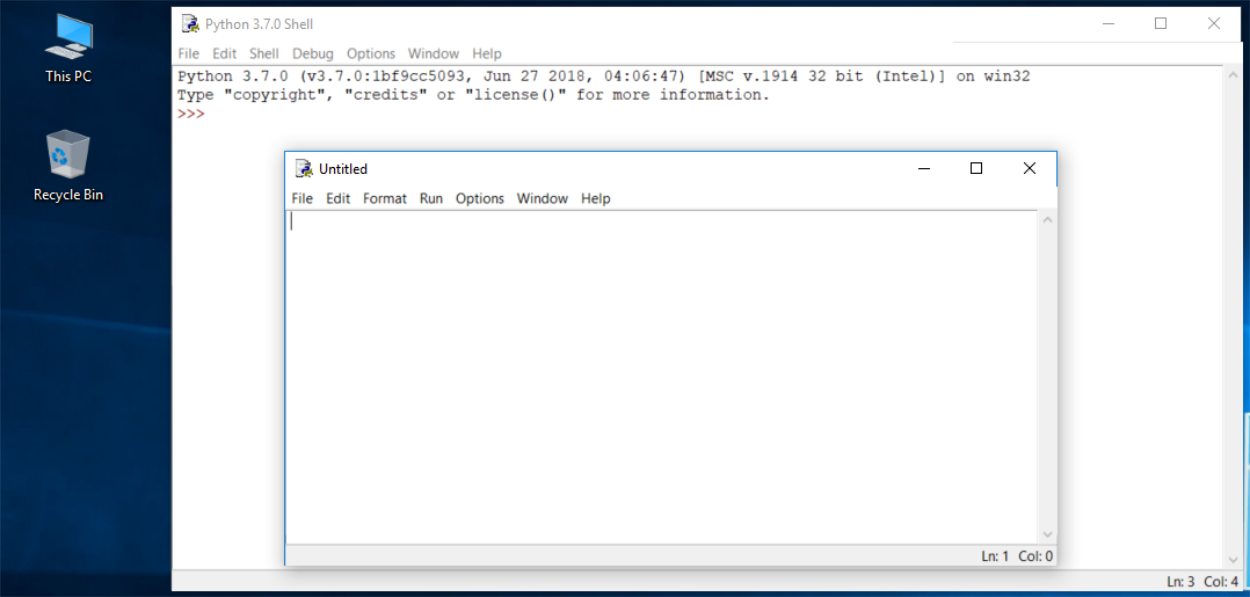
As you can see, IDLE opens a new window for you. You can use it to write and amend your code.
This is the editor window. Its only purpose is to be a workplace in which your source code is treated. Do not confuse the editor window with the shell window. They perform different functions.
The editor window is currently untitled, but it's good practice to start work by naming the source file.
Click File (in the new window), then click Save as..., select a folder for the new file (the desktop is a good place for your first programming attempts) and chose a name for the new file.
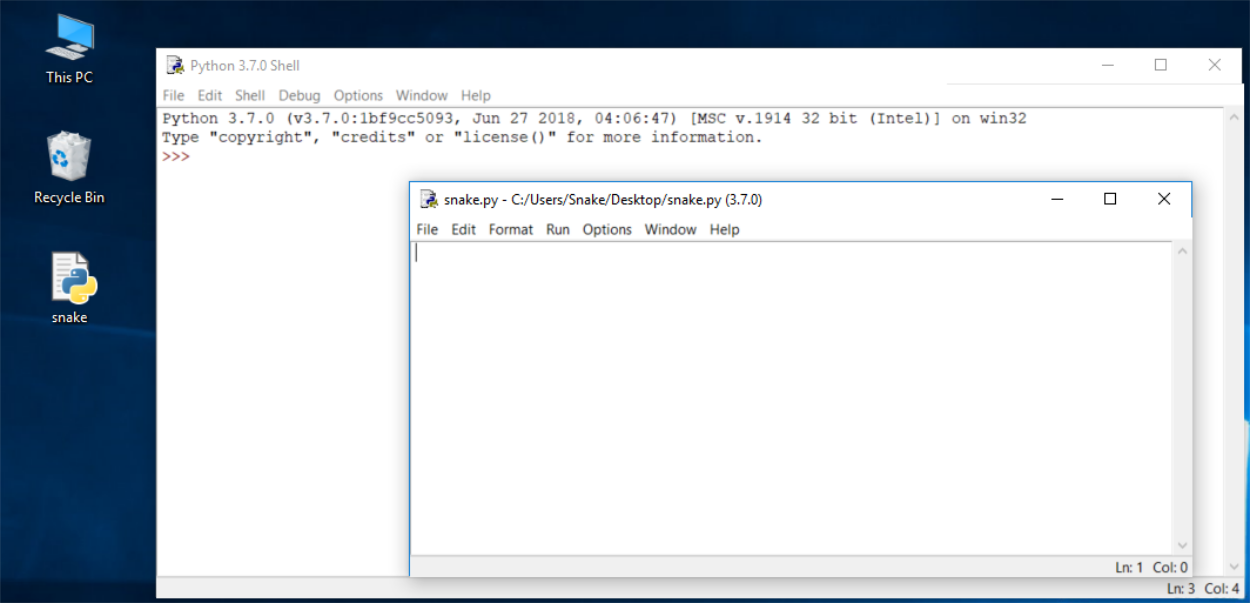
Note: don't set any extension for the file name you are going to use. Python needs its files to have the .py extension, so you should rely on the dialog window's defaults. Using the standard .py extension enables the OS to properly open these files.
How to write and run your very first program
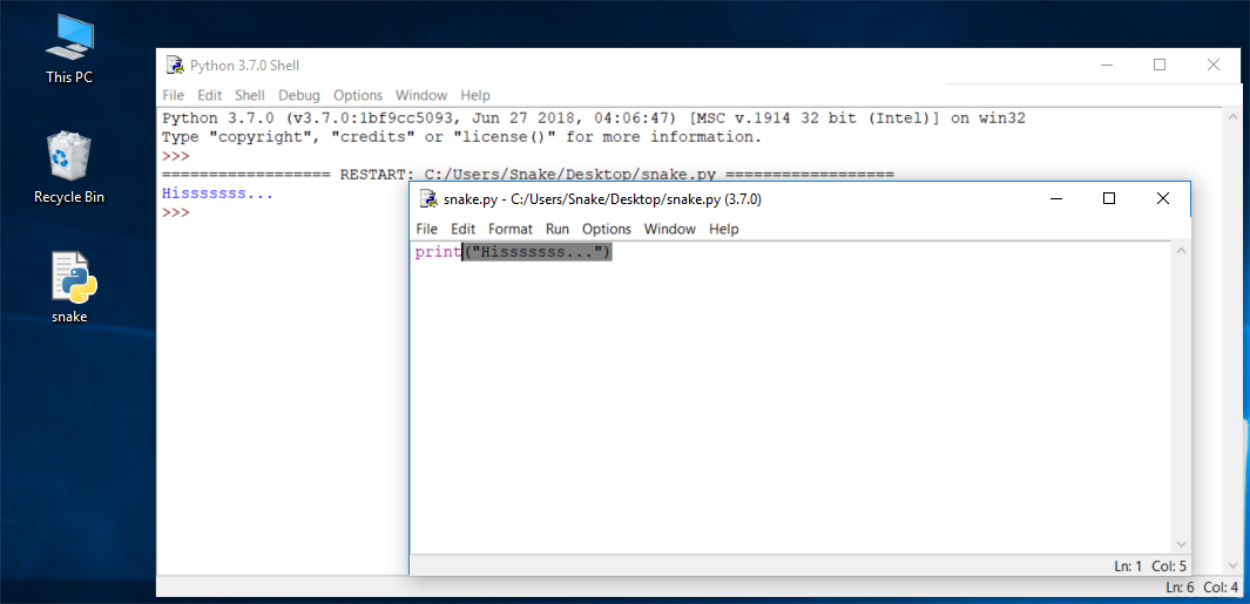
Now put just one line into your newly opened and named editor window.
The line looks like this:
print("Hisssssss...")
You can use the clipboard to copy the text into the file.
We're not going to explain the meaning of the program right now. You'll find a detailed discussion in the next chapter.
Take a closer look at the quotation marks. These are the simplest form of quotation marks (neutral, straight, dumb, etc.) commonly used in source files. Do not try to use typographic quotes (curved, curly, smart, etc.), used by advanced text processors, as Python doesn’t accept them.

If everything goes okay and there are no mistakes in the code, the console window will show you the effects caused by running the program.
In this case, the program hisses.
Try to run it once again. And once more.
Now close both windows now and return to the desktop.

How to spoil and fix your code
Now start IDLE again.
Click File, Open, point to the file you saved previously and let IDLE read it in.
Try to run it again by pressing F5 when the editor window is active.
As you can see, IDLE is able to save your code and retrieve it when you need it again.
IDLE contains one additional and helpful feature.
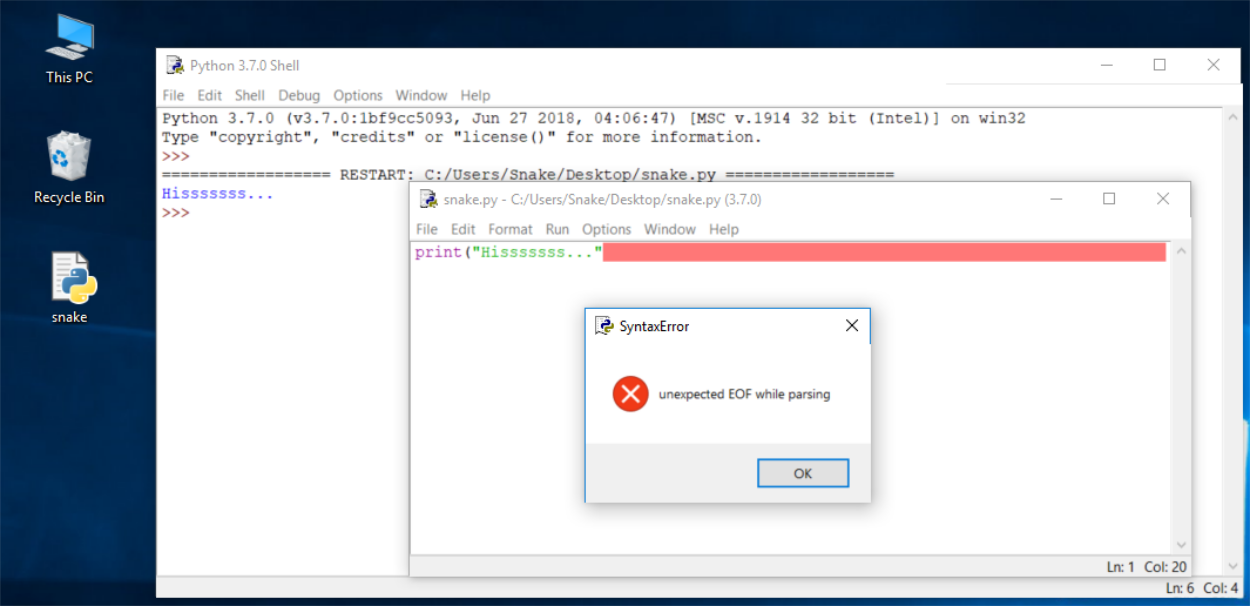
First, remove the closing parenthesis.
Then enter the parenthesis again.
Your code should look like the one down here:
Every time you put the closing parenthesis in your program, IDLE will show the part of the text limited with a pair of corresponding parentheses. This helps you to remember to place them in pairs.
Remove the closing parenthesis again. The code becomes erroneous. It contains a syntax error now. IDLE should not let you run it.
Try to run the program again. IDLE will remind you to save the modified file. Follow the instructions.
How to spoil and fix your code
Watch all the windows carefully.
A new window appears – it says that the interpreter has encountered an EOF (end-of-file) although (in its opinion) the code should contain some more text.
The editor window shows clearly where it happened.
Fix the code now. It should look like this:
print("Hisssssss...")
Run it to see if it "hisses" again.
Let's spoil the code one more time. Remove one letter from the word print. Run the code by pressing F5. As you can see, Python is not able to recognize the error.

How to spoil and fix your code
You may have noticed that the error message generated for the previous error is quite different from the first one.
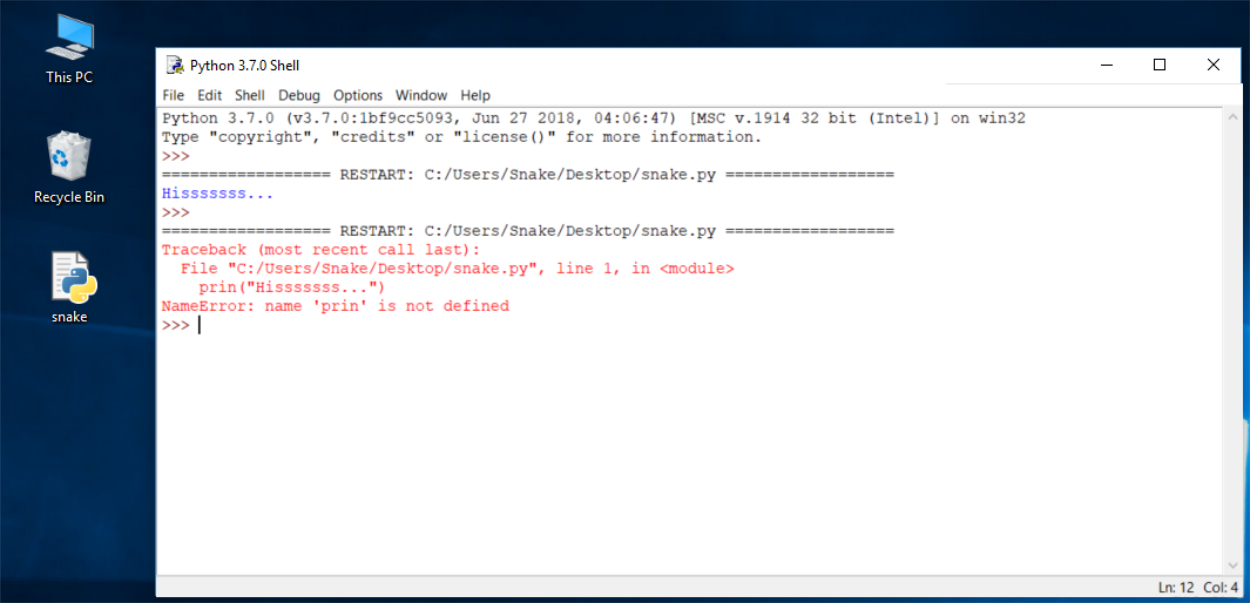
This is because the nature of the error is different and the error is discovered at a different stage of interpretation.
The editor window will not provide any useful information regarding the error, but the console windows might.
The message (in red) shows (in the subsequent lines):
- the traceback (which is the path that the code traverses through different parts of the program - you can ignore it for now, as it is empty in such a simple code);
- the location of the error (the name of the file containing the error, line number and module name); note: the number may be misleading, as Python usually shows the place where it first notices the effects of the error, not necessarily the error itself;
- the content of the erroneous line; note: IDLE’s editor window doesn’t show line numbers, but it displays the current cursor location at the bottom-right corner; use it to locate the erroneous line in a long source code;
- the name of the error and a short explanation.
Experiment with creating new files and running your code. Try to output a different message to the screen, e.g., roar!, meow, or even maybe an oink!. Try to spoil and fix your code - see what happens.
Sandbox
To test or experiment with your code, you can use a dedicated, interactive on-line programming environment.
Sandbox allows Python code to be run in an Internet browser.

It is a tool integrated within the course, which can be used as a browser-based Python sandbox that allows you to test code discussed throughout the course, as well as an interpreter that enables you to launch, perform and test the lab exercises specifically designed for this course.
The Sandbox interface consists of three main parts:
- the Editor window, which lets you type in your code,
- the Console window, which lets you see the output of your programs,
- a tool named the Action Buttons bar, which lets you run your code, refresh the editor window, download your program as a .py file, upload a .py file that will be displayed in the editor, report a bug (in case you spot anything wrong, do let us know about it!)
- and the Settings button, which lets you adjust display settings and switch between Python/C/C++ environments.
Now copy the following code:
print("Hello!")
print("Welcome to Python Essentials!")
print("THIS IS SANDBOX MODE.")
then click the Sandbox button to enter Sandbox Mode, paste the code in the editor window, and click the Run button to see what happens.
In this module, you will learn about:
- data types and the basic methods of formatting, converting, inputting and outputting data;
- operators;
- variables.
The print() function
Look at the line of code below:
print("Hello, World!")The word print that you can see here is a function name. That doesn't mean that wherever the word appears it is always a function name. The meaning of the word comes from the context in which the word has been used.
You've probably encountered the term function many times before, during math classes. You can probably also list several names of mathematical functions, like sine or log.
Python's functions, however, are more flexible, and can contain more content than their mathematical siblings.
A function (in this context) is a separate part of the computer code able to:
- cause some effect (e.g., send text to the terminal, create a file, draw an image, play a sound, etc.); this is something completely unheard of in the world of mathematics;
- evaluate a value or some values (e.g., the square root of a value or the length of a given text); this is what makes Python's functions the relatives of mathematical concepts.
Moreover, many of Python's functions can do the above two things together.
Where do the functions come from?
- They may come from Python itself; the print function is one of this kind; such a function is an added value received together with Python and its environment (it is built-in); you don't have to do anything special (e.g., ask anyone for anything) if you want to make use of it;
- they may come from one or more of Python's add-ons named modules; some of the modules come with Python, others may require separate installation - whatever the case, they all need to be explicitly connected with your code (we'll show you how to do that soon);
- you can write them yourself, placing as many functions as you want and need inside your program to make it simpler, clearer and more elegant.
The name of the function should be significant (the name of the print function is self-evident).
Of course, if you're going to make use of any already existing function, you have no influence on its name, but when you start writing your own functions, you should consider carefully your choice of names.
The print() function
As we said before, a function may have:
- an effect;
- a result.
There's also a third, very important, function component - the argument(s).
Mathematical functions usually take one argument, e.g., sin(x) takes an x, which is the measure of an angle.
Python functions, on the other hand, are more versatile. Depending on the individual needs, they may accept any number of arguments - as many as necessary to perform their tasks. Note: any number includes zero - some Python functions don't need any argument.
print("Hello, World!")
In spite of the number of needed/provided arguments, Python functions strongly demand the presence of a pair of parentheses - opening and closing ones, respectively.
If you want to deliver one or more arguments to a function, you place them inside the parentheses. If you're going to use a function which doesn't take any argument, you still have to have the parentheses.
Note: to distinguish ordinary words from function names, place a pair of empty parentheses after their names, even if the corresponding function wants one or more arguments. This is a standard convention.
The function we're talking about here is print().
Does the print() function in our example have any arguments?
Of course it does, but what are they?
The print() function
The only argument delivered to the print() function in this example is a string:
print("Hello, World!")
As you can see, the string is delimited with quotes - in fact, the quotes make the string - they cut out a part of the code and assign a different meaning to it.
You can imagine that the quotes say something like: the text between us is not code. It isn't intended to be executed, and you should take it as is.
Almost anything you put inside the quotes will be taken literally, not as code, but as data. Try to play with this particular string - modify it, enter some new content, delete some of the existing content.
The print() function
The function name (print in this case) along with the parentheses and argument(s), forms the function invocation.
We'll discuss this in more depth soon, but we should just shed a little light on it right now.
print("Hello, World!")
What happens when Python encounters an invocation like this one below?
function_name(argument)
Let's see:
- First, Python checks if the name specified is legal (it browses its internal data in order to find an existing function of the name; if this search fails, Python aborts the code);
- second, Python checks if the function's requirements for the number of arguments allows you to invoke the function in this way (e.g., if a specific function demands exactly two arguments, any invocation delivering only one argument will be considered erroneous, and will abort the code's execution);
- third, Python leaves your code for a moment and jumps into the function you want to invoke; of course, it takes your argument(s) too and passes it/them to the function;
- fourth, the function executes its code, causes the desired effect (if any), evaluates the desired result(s) (if any) and finishes its task;
- finally, Python returns to your code (to the place just after the invocation) and resumes its execution.
The print() function
Three important questions have to be answered as soon as possible:
1. What is the effect the print() function causes?
The effect is very useful and very spectacular. The function:
- takes its arguments (it may accept more than one argument and may also accept less than one argument)
- converts them into human-readable form if needed (as you may suspect, strings don't require this action, as the string is already readable)
- and sends the resulting data to the output device (usually the console); in other words, anything you put into the
print()function will appear on your screen.
No wonder then, that from now on, you'll utilize print() very intensively to see the results of your operations and evaluations.
2. What arguments does print() expect?
Any. We'll show you soon that print() is able to operate with virtually all types of data offered by Python. Strings, numbers, characters, logical values, objects - any of these may be successfully passed to print().
3. What value does the print() function evaluate?
None. Its effect is enough - print() does not evaluate anything.
The print() function - instructions
You already know that this program contains one function invocation. In turn, the function invocation is one of the possible kinds of Python instruction. Ergo, this program consists of just one instruction.
Of course, any complex program usually contains many more instructions than one. The question is: how do you couple more than one instruction into the Python code?
Python's syntax is quite specific in this area. Unlike most programming languages, Python requires that there cannot be more than one instruction in a line.
A line can be empty (i.e., it may contain no instruction at all) but it must not contain two, three or more instructions. This is strictly prohibited.
Note: Python makes one exception to this rule - it allows one instruction to spread across more than one line (which may be helpful when your code contains complex constructions).
Let's expand the code a bit, you can see it in the editor. Run it and note what you see in the console.
Your Python console should now look like this:
The itsy bitsy spider climbed up the waterspout.
Down came the rain and washed the spider out.
output
This is a good opportunity to make some observations:
- the program invokes the
print()function twice, and you can see two separate lines in the console - this means thatprint()begins its output from a new line each time it starts its execution; you can change this behavior, but you can also use it to your advantage; - each
print()invocation contains a different string, as its argument and the console content reflects it - this means that the instructions in the code are executed in the same order in which they have been placed in the source file; no next instruction is executed until the previous one is completed (there are some exceptions to this rule, but you can ignore them for now)
The print() function - the keyword arguments
Python offers another mechanism for the passing of arguments, which can be helpful when you want to convince the print() function to change its behavior a bit.
We aren't going to explain it in depth right now. We plan to do this when we talk about functions. For now, we simply want to show you how it works. Feel free to use it in your own programs.
The mechanism is called keyword arguments. The name stems from the fact that the meaning of these arguments is taken not from its location (position) but from the special word (keyword) used to identify them.
The print() function has two keyword arguments that you can use for your purposes. The first of them is named end.
In the editor window you can see a very simple example of using a keyword argument.
In order to use it, it is necessary to know some rules:
- a keyword argument consists of three elements: a keyword identifying the argument (
endhere); an equal sign (=); and a value assigned to that argument; - any keyword arguments have to be put after the last positional argument (this is very important)
In our example, we have made use of the end keyword argument, and set it to a string containing one space.
Run the code to see how it works.
The console should now be showing the following text:
My name is Python. Monty Python.output
As you can see, the end keyword argument determines the characters the print() function sends to the output once it reaches the end of its positional arguments.
The default behavior reflects the situation where the end keyword argument is implicitly used in the following way: end="\n".
Key takeaways
1. The print() function is a built-in function. It prints/outputs a specified message to the screen/consol window.
2. Built-in functions, contrary to user-defined functions, are always available and don't have to be imported. Python 3.7.1 comes with 69 built-in functions. You can find their full list provided in alphabetical order in the Python Standard Library.
3. To call a function (function invocation), you need to use the function name followed by parentheses. You can pass arguments into a function by placing them inside the parentheses. You must separate arguments with a comma, e.g., print("Hello,", "world!"). An "empty" print() function outputs an empty line to the screen.
4. Python strings are delimited with quotes, e.g., "I am a string", or 'I am a string, too'.
5. Computer programs are collections of instructions. An instruction is a command to perform a specific task when executed, e.g., to print a certain message to the screen.
6. In Python strings the backslash (\) is a special character which announces that the next character has a different meaning, e.g., \n (the newline character) starts a new output line.
7. Positional arguments are the ones whose meaning is dictated by their position, e.g., the second argument is outputted after the first, the third is outputted after the second, etc.
8. Keyword arguments are the ones whose meaning is not dictated by their location, but by a special word (keyword) used to identify them.
9. The end and sep parameters can be used for formatting the output of the print() function. The sep parameter specifies the separator between the outputted arguments (e.g., print("H", "E", "L", "L", "O", sep="-"), whereas the end parameter specifies what to print at the end of the print statement.
Literals - the data in itself
Now that you have a little knowledge of some of the powerful features offered by the print() function, it's time to learn about some new issues, and one important new term - the literal.
A literal is data whose values are determined by the literal itself.
As this is a difficult concept to understand, a good example may be helpful.
Take a look at the following set of digits:
123Can you guess what value it represents? Of course you can - it's one hundred twenty three.
But what about this:
cDoes it represent any value? Maybe. It can be the symbol of the speed of light, for example. It also can be the constant of integration. Or even the length of a hypotenuse in the sense of a Pythagorean theorem. There are many possibilities.
You cannot choose the right one without some additional knowledge.
And this is the clue: 123 is a literal, and c is not.
You use literals to encode data and to put them into your code. We're now going to show you some conventions you have to obey when using Python.
Integers
You may already know a little about how computers perform calculations on numbers. Perhaps you've heard of the binary system, and know that it's the system computers use for storing numbers, and that they can perform any operation upon them.
We won't explore the intricacies of positional numeral systems here, but we'll say that the numbers handled by modern computers are of two types:
- integers, that is, those which are devoid of the fractional part;
- and floating-point numbers (or simply floats), that contain (or are able to contain) the fractional part.
This definition is not entirely accurate, but quite sufficient for now. The distinction is very important, and the boundary between these two types of numbers is very strict. Both of these kinds of numbers differ significantly in how they're stored in a computer memory and in the range of acceptable values.
The characteristic of the numeric value which determines its kind, range, and application, is called the type.
If you encode a literal and place it inside Python code, the form of the literal determines the representation (type) Python will use to store it in the memory.
For now, let's leave the floating-point numbers aside (we'll come back to them soon) and consider the question of how Python recognizes integers.
Coding strings
Now, the next question is: how do you embed an apostrophe into a string placed between apostrophes?
You should already know the answer, or to be precise, two possible answers.
Try to print out a string containing the following message:
I'm Monty Python.Do you know how to do it? Click Check below to see if you were right:
As you can see, the backslash is a very powerful tool - it can escape not only quotes, but also apostrophes.
We've shown it already, but we want to emphasize this phenomenon once more - a string can be empty - it may contain no characters at all.
An empty string still remains a string:
''
""
Python as a calculator
Now, we're going to show you a completely new side of the print() function. You already know that the function is able to show you the values of the literals passed to it by arguments.
In fact, it can do something more. Take a look at the snippet:
print(2+2)Retype the code in the editor and run it. Can you guess the output?
You should see the number four. Feel free to experiment with other operators.
Without taking this too seriously, you've just discovered that Python can be used as a calculator. Not a very handy one, and definitely not a pocket one, but a calculator nonetheless.
Taking it more seriously, we are now entering the province of operators and expressions.
Basic operators
An operator is a symbol of the programming language, which is able to operate on the values.
For example, just as in arithmetic, the + (plus) sign is the operator which is able to add two numbers, giving the result of the addition.
Not all Python operators are as obvious as the plus sign, though, so let's go through some of the operators available in Python, and we'll explain which rules govern their use, and how to interpret the operations they perform.
We'll begin with the operators which are associated with the most widely recognizable arithmetic operations:
+, -, *, /, //, %, **
The order of their appearance is not accidental. We'll talk more about it once we've gone through them all.
Remember: Data and operators when connected together form expressions. The simplest expression is a literal itself.
Arithmetic operators: exponentiation
A ** (double asterisk) sign is an exponentiation (power) operator. Its left argument is the base, its right, the exponent.
Classical mathematics prefers notation with superscripts, just like this: 23. Pure text editors don't accept that, so Python uses ** instead, e.g., 2 ** 3.
Take a look at our examples in the editor window.
Note: we've surrounded the double asterisks with spaces in our examples. It's not compulsory, but it improves the readability of the code.
The examples show a very important feature of virtually all Python numerical operators.
Run the code and look carefully at the results it produces. Can you see any regularity here?
Remember: It's possible to formulate the following rules based on this result:
- when both
**arguments are integers, the result is an integer, too; - when at least one
**argument is a float, the result is a float, too.
Operators and their priorities
So far, we've treated each operator as if it had no connection with the others. Obviously, such an ideal and simple situation is a rarity in real programming.
Also, you will very often find more than one operator in one expression, and then this presumption is no longer so obvious.
Consider the following expression:
2 + 3 * 5You probably remember from school that multiplications precede additions.
You surely remember that you should first multiply 3 by 5 and, keeping the 15 in your memory, then add it to 2, thus getting the result of 17.
The phenomenon that causes some operators to act before others is known as the hierarchy of priorities.
Python precisely defines the priorities of all operators, and assumes that operators of a larger (higher) priority perform their operations before the operators of a lower priority.
So, if you know that * has a higher priority than +, the computation of the final result should be obvious.
Operators and their bindings
The binding of the operator determines the order of computations performed by some operators with equal priority, put side by side in one expression.
Most of Python's operators have left-sided binding, which means that the calculation of the expression is conducted from left to right.
This simple example will show you how it works. Take a look:
print(9 % 6 % 2)
There are two possible ways of evaluating this expression:
- from left to right: first
9 % 6gives3, and then3 % 2gives1; - from right to left: first
6 % 2gives0, and then9 % 0causes a fatal error.
Run the example and see what you get.
The result should be 1. This operator has left-sided binding. But there's one interesting exception.
Operators and their bindings: exponentiation
Repeat the experiment, but now with exponentiation.
Use this snippet of code:
print(2 ** 2 ** 3)
The two possible results are:
2 ** 2→4;4 ** 3→642 ** 3→8;2 ** 8→256
Run the code. What do you see?
The result clearly shows that the exponentiation operator uses right-sided binding.
What are variables?
It seems fairly obvious that Python should allow you to encode literals carrying number and text values.
You already know that you can do some arithmetic operations with these numbers: add, subtract, etc. You'll be doing that many times.
But it's quite a normal question to ask how to store the results of these operations, in order to use them in other operations, and so on.
How do you save the intermediate results, and use them again to produce subsequent ones?
Python will help you with that. It offers special "boxes" (containers) for that purpose, and these boxes are called variables - the name itself suggests that the content of these containers can be varied in (almost) any way.
What does every Python variable have?
- a name;
- a value (the content of the container)
Let's start with the issues related to a variable's name.
Variables do not appear in a program automatically. As developer, you must decide how many and which variables to use in your programs.
If you want to give a name to a variable, you must follow some strict rules:
- the name of the variable must be composed of upper-case or lower-case letters, digits, and the character
_(underscore) - the name of the variable must begin with a letter;
- the underscore character is a letter;
- upper- and lower-case letters are treated as different (a little differently than in the real world - Alice and ALICE are the same first names, but in Python they are two different variable names, and consequently, two different variables);
- the name of the variable must not be any of Python's reserved words (the keywords - we'll explain more about this soon).

Solving simple mathematical problems
Now you should be able to construct a short program solving simple mathematical problems such as the Pythagorean theorem:
The square of the hypotenuse is equal to the sum of the squares of the other two sides.
The following code evaluates the length of the hypotenuse (i.e., the longest side of a right-angled triangle, the one opposite of the right angle) using the Pythagorean theorem:
a = 3.0
b = 4.0
c = (a ** 2 + b ** 2) ** 0.5
print("c =", c)
Note: we need to make use of the ** operator to evaluate the square root as:
√ (x) = x(½)
and
c = √ a2 + b2
output- c = 5.0
The input() function
We're now going to introduce you to a completely new function, which seems to be a mirror reflection of the good old print() function.
Why? Well, print() sends data to the console.
The new function gets data from it.
print() has no usable result. The meaning of the new function is to return a very usable result.
The function is named input(). The name of the function says everything.
The input() function is able to read data entered by the user and to return the same data to the running program.
The program can manipulate the data, making the code truly interactive.
Virtually all programs read and process data. A program which doesn't get a user's input is a deaf program.
Take a look at our example:
print("Tell me anything...")
anything = input()
print("Hmm...", anything, "... Really?")
It shows a very simple case of using the input() function.
Note:
- The program prompts the user to input some data from the console (most likely using a keyboard, although it is also possible to input data using voice or image);
- the
input()function is invoked without arguments (this is the simplest way of using the function); the function will switch the console to input mode; you'll see a blinking cursor, and you'll be able to input some keystrokes, finishing off by hitting the Enter key; all the inputted data will be sent to your program through the function's result; - note: you need to assign the result to a variable; this is crucial - missing out this step will cause the entered data to be lost;
- then we use the
print()function to output the data we get, with some additional remarks.
Try to run the code and let the function show you what it can do for you.

String operators - introduction
It's time to return to these two arithmetic operators: + and *.
We want to show you that they have a second function. They are able to do something more than just add and multiply.
We've seen them in action where their arguments are numbers (floats or integers, it doesn't matter).
Now we're going to show you that they can handle strings, too, albeit in a very specific way.
Concatenation
The + (plus) sign, when applied to two strings, becomes a concatenation operator:
string + stringIt simply concatenates (glues) two strings into one. Of course, like its arithmetic sibling, it can be used more than once in one expression, and in such a context it behaves according to left-sided binding.
In contrast to its arithmetic sibling, the concatenation operator is not commutative, i.e., "ab" + "ba" is not the same as "ba" + "ab".
Don't forget - if you want the + sign to be a concatenator, not an adder, you must ensure that both its arguments are strings.
You cannot mix types here.
This simple program shows the + sign in its second use:
fnam = input("May I have your first name, please? ")
lnam = input("May I have your last name, please? ")
print("Thank you.")
print("\nYour name is " + fnam + " " + lnam + ".")
Note: using + to concatenate strings lets you construct the output in a more precise way than with a pure print() function, even if enriched with the end= and sep= keyword arguments.
Equality: the equal to operator (==)
The == (equal to) operator compares the values of two operands. If they are equal, the result of the comparison is True. If they are not equal, the result of the comparison is False.
Look at the equality comparison below - what is the result of this operation?
var == 0
Note that we cannot find the answer if we do not know what value is currently stored in the variable var.
If the variable has been changed many times during the execution of your program, or its initial value is entered from the console, the answer to this question can be given only by Python and only at runtime.
Now imagine a programmer who suffers from insomnia, and has to count black and white sheep separately as long as there are exactly twice as many black sheep as white ones.
The question will be as follows:
black_sheep == 2 * white_sheep
Due to the low priority of the == operator, the question shall be treated as equivalent to this one:
black_sheep == (2 * white_sheep)
So, let's practice your understanding of the == operator now - can you guess the output of the code below?
var = 0 # assigning 0 to var
print(var == 0)

var = 1 # assigning 1 to var
print(var == 0)
Run the code and check if you were right.
Inequality: the not equal to operator (!=)
The != (not equal to) operator compares the values of two operands, too. Here is the difference: if they are equal, the result of the comparison is False. If they are not equal, the result of the comparison is True.
Now take a look at the inequality comparison below - can you guess the result of this operation?
var = 0 # assigning 0 to var
print(var != 0)

var = 1 # assigning 1 to var
print(var != 0)
Run the code and check if you were right.
Comparison operators: greater than
You can also ask a comparison question using the > (greater than) operator.
If you want to know if there are more black sheep than white ones, you can write it as follows:
black_sheep > white_sheep # greater thanTrue confirms it; False denies it.
Comparison operators: greater than or equal to
The greater than operator has another special, non-strict variant, but it's denoted differently than in classical arithmetic notation: >= (greater than or equal to).
There are two subsequent signs, not one.
Both of these operators (strict and non-strict), as well as the two others discussed in the next section, are binary operators with left-sided binding, and their priority is greater than that shown by == and !=.
If we want to find out whether or not we have to wear a warm hat, we ask the following question:
centigrade_outside ≥ 0.0 # greater than or equal toComparison operators: less than or equal to
As you've probably already guessed, the operators used in this case are: the < (less than) operator and its non-strict sibling: <= (less than or equal to).
Look at this simple example:
current_velocity_mph < 85 # less than
current_velocity_mph ≤ 85 # less than or equal to
We're going to check if there's a risk of being fined by the highway police (the first question is strict, the second isn't).
Making use of the answers
What can you do with the answer (i.e., the result of a comparison operation) you get from the computer?
There are at least two possibilities: first, you can memorize it (store it in a variable) and make use of it later. How do you do that? Well, you would use an arbitrary variable like this:
answer = number_of_lions >= number_of_lionesses
The content of the variable will tell you the answer to the question asked.
The second possibility is more convenient and far more common: you can use the answer you get to make a decision about the future of the program.
You need a special instruction for this purpose, and we'll discuss it very soon.
Now we need to update our priority table, and put all the new operators into it. It now looks as follows:
| Priority | Operator | |
|---|---|---|
| 1 | +, - | unary |
| 2 | ** | |
| 3 | *, /, //, % | |
| 4 | +, - | binary |
| 5 | <, <=, >, >= | |
| 6 | ==, != |
Conditions and conditional execution
You already know how to ask Python questions, but you still don't know how to make reasonable use of the answers. You have to have a mechanism which will allow you to do something if a condition is met, and not do it if it isn't.
It's just like in real life: you do certain things or you don't when a specific condition is met or not, e.g., you go for a walk if the weather is good, or stay home if it's wet and cold.
To make such decisions, Python offers a special instruction. Due to its nature and its application, it's called a conditional instruction (or conditional statement).
There are several variants of it. We'll start with the simplest, increasing the difficulty slowly.
The first form of a conditional statement, which you can see below is written very informally but figuratively:
if true_or_not:
    do_this_if_true
This conditional statement consists of the following, strictly necessary, elements in this and this order only:
- the
ifkeyword; - one or more white spaces;
- an expression (a question or an answer) whose value will be interpreted solely in terms of
True(when its value is non-zero) andFalse(when it is equal to zero); - a colon followed by a newline;
- an indented instruction or set of instructions (at least one instruction is absolutely required); the indentation may be achieved in two ways - by inserting a particular number of spaces (the recommendation is to use four spaces of indentation), or by using the tab character; note: if there is more than one instruction in the indented part, the indentation should be the same in all lines; even though it may look the same if you use tabs mixed with spaces, it's important to make all indentations exactly the same - Python 3 does not allow mixing spaces and tabs for indentation.
Conditonal execution: the if statement
If a certain sleepless Python developer falls asleep when he or she counts 120 sheep, and the sleep-inducing procedure may be implemented as a special function named sleep_and_dream(), the whole code takes the following shape:
if sheep_counter >= 120: # evaluate a test expression
    sleep_and_dream() # execute if test expression is True
You can read it as: if sheep_counter is greater than or equal to 120, then fall asleep and dream (i.e., execute the sleep_and_dream function.)
We've said that conditionally executed statements have to be indented. This creates a very legible structure, clearly demonstrating all possible execution paths in the code.
Take a look at the following code:
if sheep_counter >= 120:
    make_a_bed()
    take_a_shower()
    sleep_and_dream()
feed_the_sheepdogs()
As you can see, making a bed, taking a shower and falling asleep and dreaming are all executed conditionally - when sheep_counter reaches the desired limit.
Feeding the sheepdogs, however, is always done (i.e., the feed_the_sheepdogs() function is not indented and does not belong to the if block, which means it is always executed.)
Now we're going to discuss another variant of the conditional statement, which also allows you to perform an additional action when the condition is not met.
Conditional execution: the if-else statement
We started out with a simple phrase which read: If the weather is good, we will go for a walk.
Note - there is not a word about what will happen if the weather is bad. We only know that we won't go outdoors, but what we could do instead is not known. We may want to plan something in case of bad weather, too.
We can say, for example: If the weather is good, we will go for a walk, otherwise we will go to a theater.
Now we know what we'll do if the conditions are met, and we know what we'll do if not everything goes our way. In other words, we have a "Plan B".
Python allows us to express such alternative plans. This is done with a second, slightly more complex form of the conditional statement, the if-else statement:
if true_or_false_condition:
    perform_if_condition_true
else:
    perform_if_condition_false
Thus, there is a new word: else - this is a keyword.
The part of the code which begins with else says what to do if the condition specified for the if is not met (note the colon after the word).
The if-else execution goes as follows:
- if the condition evaluates to True (its value is not equal to zero), the
perform_if_condition_truestatement is executed, and the conditional statement comes to an end; - if the condition evaluates to False (it is equal to zero), the
perform_if_condition_falsestatement is executed, and the conditional statement comes to an end.
The if-else statement: more conditional execution
By using this form of conditional statement, we can describe our plans as follows:
if the_weather_is_good:
    go_for_a_walk()
else:
    go_to_a_theater()
have_lunch()
If the weather is good, we'll go for a walk. Otherwise, we'll go to a theatre. No matter if the weather is good or bad, we'll have lunch afterwards (after the walk or after going to the theatre).
Everything we've said about indentation works in the same manner inside the else branch:
if the_weather_is_good:
    go_for_a_walk()
    have_fun()
else:
    go_to_a_theater()
    enjoy_the_movie()
have_lunch()
Nested if-else statements
Now let's discuss two special cases of the conditional statement.
First, consider the case where the instruction placed after the if is another if.
Read what we have planned for this Sunday. If the weather is fine, we'll go for a walk. If we find a nice restaurant, we'll have lunch there. Otherwise, we'll eat a sandwich. If the weather is poor, we'll go to the theater. If there are no tickets, we'll go shopping in the nearest mall.
Let's write the same in Python. Consider carefully the code here:
if the_weather_is_good:
    if nice_restaurant_is_found:
        have_lunch()
    else:
        eat_a_sandwich()
else:
    if tickets_are_available:
        go_to_the_theater()
    else:
        go_shopping()
Here are two important points:
- this use of the
ifstatement is known as nesting; remember that everyelserefers to theifwhich lies at the same indentation level; you need to know this to determine how the ifs and elses pair up; - consider how the indentation improves readability, and makes the code easier to understand and trace.
The elif statement
The second special case introduces another new Python keyword: elif. As you probably suspect, it's a shorter form of else if.
elif is used to check more than just one condition, and to stop when the first statement which is true is found.
Our next example resembles nesting, but the similarities are very slight. Again, we'll change our plans and express them as follows: If the weather is fine, we'll go for a walk, otherwise if we get tickets, we'll go to the theater, otherwise if there are free tables at the restaurant, we'll go for lunch; if all else fails, we'll return home and play chess.
Have you noticed how many times we've used the word otherwise? This is the stage where the elif keyword plays its role.
Let's write the same scenario using Python:
if the_weather_is_good
    go_for_a_walk()
elif tickets_are_available:
    go_to_the_theater()
elif table_is_available:
    go_for_lunch()
else:
    play_chess_at_home()
The way to assemble subsequent if-elif-else statements is sometimes called a cascade.
Notice again how the indentation improves the readability of the code.
Some additional attention has to be paid in this case:
- you mustn't use
elsewithout a precedingif; elseis always the last branch of the cascade, regardless of whether you've usedelifor not;elseis an optional part of the cascade, and may be omitted;- if there is an
else branch in the cascade, only one of all the branches is executed; - if there is no
else branch, it's possible that none of the available branches is executed.
This may sound a little puzzling, but hopefully some simple examples will help shed more light.
xample 1:
We'll start with the simplest case - how to identify the larger of two numbers:
# read two numbers
number1 = int(input("Enter the first number: "))
number2 = int(input("Enter the second number: "))

# choose the larger number
if number1 > number2:
    larger_number = number1
else:
    larger_number = number2

# print the result
print("The larger number is:", larger_number)
The above snippet should be clear - it reads two integer values, compares them, and finds which is the larger.
Example 2:
Now we're going to show you one intriguing fact. Python has an interesting feature, look at the code below:
# read two numbers
number1 = int(input("Enter the first number: "))
number2 = int(input("Enter the second number: "))

# choose the larger number
if number1 > number2: larger_number = number1
else: larger_number = number2

# print the result
print("The larger number is:", larger_number)
Note: if any of the if-elif-else branches contains just one instruction, you may code it in a more comprehensive form (you don't need to make an indented line after the keyword, but just continue the line after the colon).
This style, however, may be misleading, and we're not going to use it in our future programs, but it's definitely worth knowing if you want to read and understand someone else's programs.
There are no other differences in the code.
Example 3:
It's time to complicate the code - let's find the largest of three numbers. Will it enlarge the code? A bit.
We assume that the first value is the largest. Then we verify this hypothesis with the two remaining values.
Look at the code below:
# read three numbers
number1 = int(input("Enter the first number: "))
number2 = int(input("Enter the second number: "))
number3 = int(input("Enter the third number: "))

# We temporarily assume that the first number
# is the largest one.
# We will verify this soon.
largest_number = number1

# we check if the second number is larger than current largest_number
# and update largest_number if needed
if number2 > largest_number:
    largest_number = number2

# we check if the third number is larger than current largest_number
# and update largest_number if needed
if number3 > largest_number:
    largest_number = number3

# print the result
print("The largest number is:", largest_number)
This method is significantly simpler than trying to find the largest number all at once, by comparing all possible pairs of numbers (i.e., first with second, second with third, third with first). Try to rebuild the code for yourself.
Pseudocode and introduction to loops
You should now be able to write a program which finds the largest of four, five, six, or even ten numbers.
You already know the scheme, so extending the size of the problem will not be particularly complex.
But what happens if we ask you to write a program that finds the largest of two hundred numbers? Can you imagine the code?
You'll need two hundred variables. If two hundred variables isn't bad enough, try to imagine searching for the largest of a million numbers.
Imagine a code that contains 199 conditional statements and two hundred invocations of the input() function. Luckily, you don't need to deal with that. There's a simpler approach.
We'll ignore the requirements of Python syntax for now, and try to analyze the problem without thinking about the real programming. In other words, we'll try to write the algorithm, and when we're happy with it, we'll implement it.
In this case, we'll use a kind of notation which is not an actual programming language (it can be neither compiled nor executed), but it is formalized, concise and readable. It's called pseudocode.
Let's look at our pseudocode below:
line 01 largest_number = -999999999
line 02 number = int(input())
line 03 if number == -1:
line 04     print(largest_number)
line 05     exit()
line 06 if number > largest_number:
line 07     largest_number = number
line 08 go to line 02
What's happening in it?
Firstly, we can simplify the program if, at the very beginning of the code, we assign the variable largestNumber with a value which will be smaller than any of the entered numbers. We'll use -999999999 for that purpose.
Secondly, we assume that our algorithm will not know in advance how many numbers will be delivered to the program. We expect that the user will enter as many numbers as she/he wants - the algorithm will work well with one hundred and with one thousand numbers. How do we do that?
We make a deal with the user: when the value -1 is entered, it will be a sign that there are no more data and the program should end its work.
Otherwise, if the entered value is not equal to -1, the program will read another number, and so on.
The trick is based on the assumption that any part of the code can be performed more than once - precisely, as many times as needed.
Performing a certain part of the code more than once is called a loop. The meaning of this term is probably obvious to you.
Lines 02 through 08 make a loop. We'll pass through them as many times as needed to review all the entered values.
Can you use a similar structure in a program written in Python? Yes, you can.
Extra Info
Python often comes with a lot of built-in functions that will do the work for you. For example, to find the largest number of all, you can use a Python built-in function called max(). You can use it with multiple arguments. Analyze the code below:
# read three numbers
number1 = int(input("Enter the first number: "))
number2 = int(input("Enter the second number: "))
number3 = int(input("Enter the third number: "))

# check which one of the numbers is the greatest
# and pass it to the largest_number variable

largest_number = max(number1, number2, number3)

# print the result
print("The largest number is:", largest_number)
By the same fashion, you can use the min() function to return the lowest number. You can rebuild the above code and experiment with it in the Sandbox.
We're going to talk about these (and many other) functions soon. For the time being, our focus will be put on conditional execution and loops to let you gain more confidence in programming and teach you the skills that will let you fully understand and apply the two concepts in your code. So, for now, we're not taking any shortcuts.
Key takeaways
1. The comparison (or the so-called relational) operators are used to compare values. The table below illustrates how the comparison operators work, assuming that x = 0, y = 1, and z = 0:
| Operator | Description | Example |
|---|---|---|
== | returns if operands' values are equal, and False otherwise | x == y # False
x == z # True |
!= | returns True if operands' values are not equal, and False otherwise | x != y # True
x != z # False |
> | True if the left operand's value is greater than the right operand's value, and False otherwise | x > y # False
y > z # True |
< | True if the left operand's value is less than the right operand's value, and False otherwise | x < y # True
y < z # False |
≥ | True if the left operand's value is greater than or equal to the right operand's value, and False otherwise | x >= y # False
x >= z # True
y >= z # True |
≤ | True if the left operand's value is less than or equal to the right operand's value, and False otherwise | x <= y # True
x <= z # True
y <= z # False |
2. When you want to execute some code only if a certain condition is met, you can use a conditional statement:
Looping your code with while
Do you agree with the statement presented below?
while there is something to do
    do it
Note that this record also declares that if there is nothing to do, nothing at all will happen.
In general, in Python, a loop can be represented as follows:
while conditional_expression:
    instruction
If you notice some similarities to the if instruction, that's quite all right. Indeed, the syntactic difference is only one: you use the word while instead of the word if.
The semantic difference is more important: when the condition is met, if performs its statements only once; while repeats the execution as long as the condition evaluates to True.
Note: all the rules regarding indentation are applicable here, too. We'll show you this soon.
Look at the algorithm below:
while conditional_expression:
    instruction_one
    instruction_two
    instruction_three
    :
    :
    instruction_n
It is now important to remember that:
- if you want to execute more than one statement inside one
while, you must (as withif) indent all the instructions in the same way; - an instruction or set of instructions executed inside the
whileloop is called the loop's body; - if the condition is
False(equal to zero) as early as when it is tested for the first time, the body is not executed even once (note the analogy of not having to do anything if there is nothing to do); - the body should be able to change the condition's value, because if the condition is
Trueat the beginning, the body might run continuously to infinity - notice that doing a thing usually decreases the number of things to do).
An infinite loop
An infinite loop, also called an endless loop, is a sequence of instructions in a program which repeat indefinitely (loop endlessly.)
Here's an example of a loop that is not able to finish its execution:
while True:
    print("I'm stuck inside a loop.")
This loop will infinitely print "I'm stuck inside a loop." on the screen.
If you want to get the best learning experience from seeing how an infinite loop behaves, launch IDLE, create a New File, copy-paste the above code, save your file, and run the program. What you will see is the never-ending sequence of "I'm stuck inside a loop." strings printed to the Python console window. To terminate your program, just press Ctrl-C (or Ctrl-Break on some computers). This will cause the so-called KeyboardInterrupt exception and let your program get out of the loop. We'll talk about it later in the course.
Let's go back to the sketch of the algorithm we showed you recently. We're going to show you how to use this newly learned loop to find the largest number from a large set of entered data.
Analyze the program carefully. Locate the loop's body and find out how the body is exited:
# we will store the current largest number here
largest_number = -999999999

# input the first value
number = int(input("Enter a number or type -1 to stop: "))

# if the number is not equal to -1, we will continue
while number != -1:
    # is number larger than largest_number?
    if number > largest_number:
        # yes, update largest_number
        largest_number = number
    # input the next number
    number = int(input("Enter a number or type -1 to stop: "))

# print the largest number
print("The largest number is:", largest_number)
Check how this code implements the algorithm we showed you earlier.
The while loop: more examples
Let's look at another example employing the while loop. Follow the comments to find out the idea and the solution.
# A program that reads a sequence of numbers
# and counts how many numbers are even and how many are odd.
# The program terminates when zero is entered.

odd_numbers = 0
even_numbers = 0

# read the first number
number = int(input("Enter a number or type 0 to stop: "))

# 0 terminates execution
while number != 0:
    # check if the number is odd
    if number % 2 == 1:
        # increase the odd_numbers counter
        odd_numbers += 1
    else:
        # increase the even_numbers counter
        even_numbers += 1
    # read the next number
    number = int(input("Enter a number or type 0 to stop: "))

# print results
print("Odd numbers count:", odd_numbers)
print("Even numbers count:", even_numbers)
Certain expressions can be simplified without changing the program's behavior.
Try to recall how Python interprets the truth of a condition, and note that these two forms are equivalent:
while number != 0: and while number:.
The condition that checks if a number is odd can be coded in these equivalent forms, too:
if number % 2 == 1: and if number % 2:.
Using a counter variable to exit a loop
Look at the snippet below:
counter = 5
while counter != 0:
    print("Inside the loop.", counter)
    counter -= 1
print("Outside the loop.", counter)
This code is intended to print the string "Inside the loop." and the value stored in the counter variable during a given loop exactly five times. Once the condition has not been met (the counter variable has reached 0), the loop is exited, and the message "Outside the loop." as well as the value stored in counter is printed.
But there's one thing that can be written more compactly - the condition of the while loop.
Can you see the difference?
counter = 5
while counter:
    print("Inside the loop.", counter)
    counter -= 1
print("Outside the loop.", counter)
The while loop: more examples
Let's look at another example employing the while loop. Follow the comments to find out the idea and the solution.
# A program that reads a sequence of numbers
# and counts how many numbers are even and how many are odd.
# The program terminates when zero is entered.
odd_numbers = 0
even_numbers = 0
# read the first number
number = int(input("Enter a number or type 0 to stop: "))
# 0 terminates execution
while number != 0:
# check if the number is odd
if number % 2 == 1:
# increase the odd_numbers counter
odd_numbers += 1
else:
# increase the even_numbers counter
even_numbers += 1
# read the next number
number = int(input("Enter a number or type 0 to stop: "))
# print results
print("Odd numbers count:", odd_numbers)
print("Even numbers count:", even_numbers)
Certain expressions can be simplified without changing the program's behavior.
Try to recall how Python interprets the truth of a condition, and note that these two forms are equivalent:
while number != 0: and while number:.
The condition that checks if a number is odd can be coded in these equivalent forms, too:
if number % 2 == 1: and if number % 2:.
Using a counter variable to exit a loop
Look at the snippet below:
counter = 5
while counter != 0:
print("Inside the loop.", counter)
counter -= 1
print("Outside the loop.", counter)
This code is intended to print the string "Inside the loop." and the value stored in the counter variable during a given loop exactly five times. Once the condition has not been met (the counter variable has reached 0), the loop is exited, and the message "Outside the loop." as well as the value stored in counter is printed.
But there's one thing that can be written more compactly - the condition of the while loop.
Can you see the difference?
counter = 5
while counter:
print("Inside the loop.", counter)
counter -= 1
print("Outside the loop.", counter)
Looping your code with for
Another kind of loop available in Python comes from the observation that sometimes it's more important to count the "turns" of the loop than to check the conditions.
Imagine that a loop's body needs to be executed exactly one hundred times. If you would like to use the while loop to do it, it may look like this:
i = 0
while i < 100:
# do_something()
i += 1
It would be nice if somebody could do this boring counting for you. Is that possible?
Of course it is - there's a special loop for these kinds of tasks, and it is named for.
Actually, the for loop is designed to do more complicated tasks - it can "browse" large collections of data item by item. We'll show you how to do that soon, but right now we're going to present a simpler variant of its application.
Take a look at the snippet:
for i in range(100):
# do_something()
pass
There are some new elements. Let us tell you about them:
- the for keyword opens the
for loop; note - there's no condition after it; you don't have to think about conditions, as they're checked internally, without any intervention; - any variable after the for keyword is the control variable of the loop; it counts the loop's turns, and does it automatically;
- the in keyword introduces a syntax element describing the range of possible values being assigned to the control variable;
- the
range() function (this is a very special function) is responsible for generating all the desired values of the control variable; in our example, the function will create (we can even say that it will feed the loop with) subsequent values from the following set: 0, 1, 2 .. 97, 98, 99; note: in this case, the range() function starts its job from 0 and finishes it one step (one integer number) before the value of its argument; - note the pass keyword inside the loop body - it does nothing at all; it's an empty instruction - we put it here because the
for loop's syntax demands at least one instruction inside the body (by the way - if, elif, else and while express the same thing)
Take a look at the snippet below. Can you predict its output?
for i in range(10):
print("The value of i is currently", i)
Run the code to check if you were right.
Note:
- the loop has been executed ten times (it's the
range() function's argument) - the last control variable's value is
9 (not 10, as it starts from 0, not from 1)
The range() function invocation may be equipped with two arguments, not just one:
for i in range(2, 8):
print("The value of i is currently", i)
In this case, the first argument determines the initial (first) value of the control variable.
The last argument shows the first value the control variable will not be assigned.
Note: the range() function accepts only integers as its arguments, and generates sequences of integers.
Can you guess the output of the program? Run it to check if you were right now, too.
The first value shown is 2 (taken from the range()'s first argument.)
The last is 7 (although the range()'s second argument is 8).
The break and continue statements
So far, we've treated the body of the loop as an indivisible and inseparable sequence of instructions that are performed completely at every turn of the loop. However, as developer, you could be faced with the following choices:
- it appears that it's unnecessary to continue the loop as a whole; you should refrain from further execution of the loop's body and go further;
- it appears that you need to start the next turn of the loop without completing the execution of the current turn.
Python provides two special instructions for the implementation of both these tasks. Let's say for the sake of accuracy that their existence in the language is not necessary - an experienced programmer is able to code any algorithm without these instructions. Such additions, which don't improve the language's expressive power, but only simplify the developer's work, are sometimes called syntactic candy, or syntactic sugar.
These two instructions are:
break - exits the loop immediately, and unconditionally ends the loop's operation; the program begins to execute the nearest instruction after the loop's body;continue - behaves as if the program has suddenly reached the end of the body; the next turn is started and the condition expression is tested immediately.
Both these words are keywords.
Now we'll show you two simple examples to illustrate how the two instructions work. Look at the code in the editor. Run the program and analyze the output. Modify the code and experiment
The break and continue statements: more examples
Let's return to our program that recognizes the largest among the entered numbers. We'll convert it twice, using the break and continue instructions.
Analyze the code, and judge whether and how you would use either of them.
The break variant goes here:
largestNumber = -99999999
counter = 0
while True:
number = int(input("Enter a number or type -1 to end program: "))
if number == -1:
break
counter += 1
if number > largestNumber:
largestNumber = number
if counter != 0:
print("The largest number is", largestNumber)
else:
print("You haven't entered any number.")
Run it, test it, and experiment with it.
And now the continue variant:
largestNumber = -99999999
counter = 0
number = int(input("Enter a number or type -1 to end program: "))
while number != -1:
if number == -1:
continue
counter += 1
if number > largestNumber:
largestNumber = number
number = int(input("Enter a number or type -1 to end program: "))
if counter:
print("The largest number is", largestNumber)
else:
print("You haven't entered any number."
The while loop and the else branch
Both loops, while and for, have one interesting (and rarely used) feature.
We'll show you how it works - try to judge for yourself if it's usable and whether you can live without it or not.
In other words, try to convince yourself if the feature is valuable and useful, or is just syntactic sugar.
Take a look at the snippet in the editor. There's something strange at the end - the else keyword.
As you may have suspected, loops may have the else branch too, like ifs.
The loop's else branch is always executed once, regardless of whether the loop has entered its body or not.
Can you guess the output? Run the program to check if you were right.
Modify the snippet a bit so that the loop has no chance to execute its body even once:
i = 5
while i < 5:
print(i)
i += 1
else:
print("else:", i)
The for loop and the else branch
for loops behave a bit differently - take a look at the snippet in the editor and run it.
The output may be a bit surprising.
The i variable retains its last value.
Modify the code a bit to carry out one more experiment.
i = 111
for i in range(2, 1):
print(i)
else:
print("else:", i)
Can you guess the output?
The loop's body won't be executed here at all. Note: we've assigned the i variable before the loop.
Run the program and check its output.
When the loop's body isn't executed, the control variable retains the value it had before the loop.
Note: if the control variable doesn't exist before the loop starts, it won't exist when the execution reaches the else branch.
Key takeaways
1. There are two types of loops in Python: while and for:
- the
while loop executes a statement or a set of statements as long as a specified boolean condition is true, e.g.:
# Example 1
while True:
print("Stuck in an infinite loop.")
# Example 2
counter = 5
while counter > 2:
print(counter)
counter -= 1
- the
for loop executes a set of statements many times; it's used to iterate over a sequence (e.g., a list, a dictionary, a tuple, or a set - you will learn about them soon) or other objects that are iterable (e.g., strings). You can use the for loop to iterate over a sequence of numbers using the built-in range function. Look at the examples below:
# Example 1
word = "Python"
for letter in word:
print(letter, end="*")
# Example 2
for i in range(1, 10):
if i % 2 == 0:
print(i)
3. The while and for loops can also have an else clause in Python. The else clause executes after the loop finishes its execution as long as it has not been terminated by break, e.g.:
n = 0
while n != 3:
print(n)
n += 1
else:
print(n, "else")
print()
for i in range(0, 3):
print(i)
else:
print(i, "else")
4. The range() function generates a sequence of numbers. It accepts integers and returns range objects. The syntax of range() looks as follows: range(start, stop, step), where:
start is an optional parameter specifying the starting number of the sequence (0 by default)stop is an optional parameter specifying the end of the sequence generated (it is not included),- and
step is an optional parameter specifying the difference between the numbers in the sequence (1 by default.)
Example code:
for i in range(3):
print(i, end=" ") # outputs: 0 1 2
for i in range(6, 1, -2):
print(i, end=" ") # outputs: 6, 4, 2
Key takeaways: continued
Exercise 1
Create a for loop that counts from 0 to 10, and prints odd numbers to the screen. Use the skeleton below:
for i in range(1, 11):
# line of code
# line of code
Sample solution:
for i in range(0, 11):
if i % 2 != 0:
print(i)
Exercise 2
Create a while loop that counts from 0 to 10, and prints odd numbers to the screen. Use the skeleton below:
x = 1
while x < 11:
# line of code
# line of code
# line of code
Sample solution:
x = 1
while x < 11:
if x % 2 != 0:
print(x)
x += 1
Exercise 3
Create a program with a for loop and a break statement. The program should iterate over characters in an email address, exit the loop when it reaches the @ symbol, and print the part before @ on one line. Use the skeleton below:
for ch in "john.smith@pythoninstitute.org":
if ch == "@":
# line of code
# line of code
Sample solution:
for ch in "john.smith@pythoninstitute.org":
if ch == "@":
break
print(ch, end="")
Exercise 4
Create a program with a for loop and a continue statement. The program should iterate over a string of digits, replace each 0 with x, and print the modified string to the screen. Use the skeleton below:
for digit in "0165031806510":
if digit == "0":
# line of code
# line of code
# line of code
Sample solution:
for digit in "0165031806510":
if digit == "0":
print("x", end="")
continue
print(digit, end="")
Exercise 5
What is the output of the following code?
n = 3
while n > 0:
print(n + 1)
n -= 1
else:
print(n)
4
3
2
0
Exercise 6
What is the output of the following code?
n = range(4)
for num in n:
print(num - 1)
else:
print(num)
-1
0
1
2
3
Exercise 7
What is the output of the following code?
for i in range(0, 6, 3):
print(i)
0
3
Computer logic
Have you noticed that the conditions we've used so far have been very simple, not to say, quite primitive? The conditions we use in real life are much more complex. Let's look at this sentence:
If we have some free time, and the weather is good, we will go for a walk.
We've used the conjunction and, which means that going for a walk depends on the simultaneous fulfilment of these two conditions. In the language of logic, such a connection of conditions is called a conjunction. And now another example:
If you are in the mall or I am in the mall, one of us will buy a gift for Mom.
The appearance of the word or means that the purchase depends on at least one of these conditions. In logic, such a compound is called a disjunction.
It's clear that Python must have operators to build conjunctions and disjunctions. Without them, the expressive power of the language would be substantially weakened. They're called logical operators.
and
One logical conjunction operator in Python is the word and. It's a binary operator with a priority that is lower than the one expressed by the comparison operators. It allows us to code complex conditions without the use of parentheses like this one:
counter > 0 and value == 100
The result provided by the and operator can be determined on the basis of the truth table.
If we consider the conjunction of A and B, the set of possible values of arguments and corresponding values of the conjunction looks as follows:
Argument AArgument BA and BFalseFalseFalseFalseTrueFalseTrueFalseFalseTrueTrueTrue
or
A disjunction operator is the word or. It's a binary operator with a lower priority than and (just like + compared to *). Its truth table is as follows:
Argument AArgument BA or BFalseFalseFalseFalseTrueTrueTrueFalseTrueTrueTrueTrue
not
In addition, there's another operator that can be applied for constructing conditions. It's a unary operator performing a logical negation. Its operation is simple: it turns truth into falsehood and falsehood into truth.
This operator is written as the word not, and its priority is very high: the same as the unary + and -. Its truth table is simple:
Argumentnot ArgumentFalseTrueTrueFalse
Logical expressions
Let's create a variable named var and assign 1 to it. The following conditions are pairwise equivalent:
print(var > 0)
print(not (var <= 0))
print(var != 0)
print(not (var == 0))
You may be familiar with De Morgan's laws. They say that:
The negation of a conjunction is the disjunction of the negations.
The negation of a disjunction is the conjunction of the negations.
Let's write the same thing using Python:
not (p and q) == (not p) or (not q)
not (p or q) == (not p) and (not q)
Note how the parentheses have been used to code the expressions - we put them there to improve readability.
We should add that none of these two-argument operators can be used in the abbreviated form known as op=. This exception is worth remembering.
Logical values vs. single bits
Logical operators take their arguments as a whole regardless of how many bits they contain. The operators are aware only of the value: zero (when all the bits are reset) means False; not zero (when at least one bit is set) means True.
The result of their operations is one of these values: False or True. This means that this snippet will assign the value True to the j variable if i is not zero; otherwise, it will be False.
i = 1
j = not not i
Bitwise operators
However, there are four operators that allow you to manipulate single bits of data. They are called bitwise operators.
They cover all the operations we mentioned before in the logical context, and one additional operator. This is the xor (as in exclusive or) operator, and is denoted as ^ (caret).
Here are all of them:
& (ampersand) - bitwise conjunction;| (bar) - bitwise disjunction;~ (tilde) - bitwise negation;^ (caret) - bitwise exclusive or (xor).
Bitwise operations (&, |, and ^) Arg AArg BArg B & Arg BArg A | Arg BArg A ^ Arg B00000010111001111110
Bitwise operations (~) Arg~Arg0110
Let's make it easier:
& requires exactly two 1s to provide 1 as the result;| requires at least one 1 to provide 1 as the result;^ requires exactly one 1 to provide 1 as the result.
Let us add an important remark: the arguments of these operators must be integers; we must not use floats here.
The difference in the operation of the logical and bit operators is important: the logical operators do not penetrate into the bit level of its argument. They're only interested in the final integer value.
Bitwise operators are stricter: they deal with every bit separately. If we assume that the integer variable occupies 64 bits (which is common in modern computer systems), you can imagine the bitwise operation as a 64-fold evaluation of the logical operator for each pair of bits of the arguments. This analogy is obviously imperfect, as in the real world all these 64 operations are performed at the same time (simultaneously).
Logical vs. bit operations: continued
We'll now show you an example of the difference in operation between the logical and bit operations. Let's assume that the following assignments have been performed:
i = 15
j = 22
If we assume that the integers are stored with 32 bits, the bitwise image of the two variables will be as follows:
i: 00000000000000000000000000001111
j: 00000000000000000000000000010110
The assignment is given:
log = i and j
We are dealing with a logical conjunction here. Let's trace the course of the calculations. Both variables i and j are not zeros, so will be deemed to represent True. Consulting the truth table for the and operator, we can see that the result will be True. No other operations are performed.
log: True
Now the bitwise operation - here it is:
bit = i & j
The & operator will operate with each pair of corresponding bits separately, producing the values of the relevant bits of the result. Therefore, the result will be as follows:
i00000000000000000000000000001111j00000000000000000000000000010110bit = i & j00000000000000000000000000000110
These bits correspond to the integer value of six.
Let's look at the negation operators now. First the logical one:
logneg = not i
The logneg variable will be set to False - nothing more needs to be done.
The bitwise negation goes like this:
bitneg = ~i
It may be a bit surprising: the bitneg variable value is -16. This may seem strange, but isn't at all. If you wish to learn more, you should check out the binary numeral system and the rules governing two's complement numbers.
i00000000000000000000000000001111bitneg = ~i11111111111111111111111111110000
Each of these two-argument operators can be used in abbreviated form. These are the examples of their equivalent notations:
x = x & yx &= y x = x | yx |= y x = x ^ yx ^= y
How do we deal with single bits?
We'll now show you what you can use bitwise operators for. Imagine that you're a developer obliged to write an important piece of an operating system. You've been told that you're allowed to use a variable assigned in the following way:
flagRegister = 0x1234
The variable stores the information about various aspects of system operation. Each bit of the variable stores one yes/no value. You've also been told that only one of these bits is yours - the third (remember that bits are numbered from zero, and bit number zero is the lowest one, while the highest is number 31). The remaining bits are not allowed to change, because they're intended to store other data. Here's your bit marked with the letter x:
flagRegister = 0000000000000000000000000000x000
You may be faced with the following tasks:
1. Check the state of your bit - you want to find out the value of your bit; comparing the whole variable to zero will not do anything, because the remaining bits can have completely unpredictable values, but you can use the following conjunction property:
x & 1 = x
x & 0 = 0
If you apply the & operation to the flagRegister variable along with the following bit image:
00000000000000000000000000001000
(note the 1 at your bit's position) as the result, you obtain one of the following bit strings:
00000000000000000000000000001000 if your bit was set to 10000000000000000000000000000000 if your bit was reset to 0
Such a sequence of zeros and ones, whose task is to grab the value or to change the selected bits, is called a bit mask.
Let's build a bit mask to detect the state of your bit. It should point to the third bit. That bit has the weight of 23 = 8. A suitable mask could be created by the following declaration:
theMask = 8
You can also make a sequence of instructions depending on the state of your bit i here it is:
if flagRegister & theMask:
# my bit is set
else:
# my bit is reset
2. Reset your bit - you assign a zero to the bit while all the other bits must remain unchanged; let's use the same property of the conjunction as before, but let's use a slightly different mask - exactly as below:
11111111111111111111111111110111
Note that the mask was created as a result of the negation of all the bits of theMask variable. Resetting the bit is simple, and looks like this (choose the one you like more):
flagRegister = flagRegister & ~theMask
flagregister &= ~theMask
3. Set your bit - you assign a 1 to your bit, while all the remaining bits must remain unchanged; use the following disjunction property:
x | 1 = 1
x | 0 = x
You're now ready to set your bit with one of the following instructions:
flagRegister = flagRegister | theMask
flagRegister |= theMask
4. Negate your bit - you replace a 1 with a 0 and a 0 with a 1. You can use an interesting property of the xor operator:
x ^ 1 = ~x
x ^ 0 = x
and negate your bit with the following instructions:
flagRegister = flagRegister ^ theMask
flagRegister ^= theMask
Binary left shift and binary right shift
Python offers yet another operation relating to single bits: shifting. This is applied only to integer values, and you mustn't use floats as arguments for it.
You already apply this operation very often and quite unconsciously. How do you multiply any number by ten? Take a look:
12345 × 10 = 123450
As you can see, multiplying by ten is in fact a shift of all the digits to the left and filling the resulting gap with zero.
Division by ten? Take a look:
12340 ÷ 10 = 1234
Dividing by ten is nothing but shifting the digits to the right.
The same kind of operation is performed by the computer, but with one difference: as two is the base for binary numbers (not 10), shifting a value one bit to the left thus corresponds to multiplying it by two; respectively, shifting one bit to the right is like dividing by two (notice that the rightmost bit is lost).
The shift operators in Python are a pair of digraphs: << and >>, clearly suggesting in which direction the shift will act.
value << bits
value >> bits
The left argument of these operators is an integer value whose bits are shifted. The right argument determines the size of the shift.
It shows that this operation is certainly not commutative.
The priority of these operators is very high. You'll see them in the updated table of priorities, which we'll show you at the end of this section.
Take a look at the shifts in the editor window.
The final print() invocation produces the following output:
17 68 8
Note:
17 // 2 → 8 (shifting to the right by one bit is the same as integer division by two)17 * 4 → 68 (shifting to the left by two bits is the same as integer multiplication by four)
And here is the updated priority table, containing all the operators introduced so far:
Priority Operator 1 ~, +, -unary 2 **3 *, /, //, %4 +, -binary 5 <<, >>6 <, <=, >, >=7 ==, !=8 &9 |10 =, +=, -=, *=, /=, %=, &=, ^=, |=, >>=, <<=
Key takeaways
1. Python supports the following logical operators:
and → if both operands are true, the condition is true, e.g., (True and True) is True,or → if any of the operands are true, the condition is true, e.g., (True or False) is True,not → returns false if the result is true, and returns true if the result is false, e.g., not True is False.
2. You can use bitwise operators to manipulate single bits of data. The following sample data:
x = 15, which is 0000 1111 in binary,y = 16, which is 0001 0000 in binary.
will be used to illustrate the meaning of bitwise operators in Python. Analyze the examples below:
& does a bitwise and, e.g., x & y = 0, which is 0000 0000 in binary,| does a bitwise or, e.g., x | y = 31, which is 0001 1111 in binary,˜ does a bitwise not, e.g., ˜ x = 240, which is 1111 0000 in binary,^ does a bitwise xor, e.g., x ^ y = 31, which is 0001 1111 in binary,>> does a bitwise right shift, e.g., y >> 1 = 8, which is 0000 1000 in binary,<< does a bitwise left shift, e.g., y << 3 = , which is 1000 0000 in binary,
Exercise 1
What is the output of the following snippet?
x = 1
y = 0
z = ((x == y) and (x == y)) or not(x == y)
print(not(z))
False
Exercise 2
What is the output of the following snippet?
x = 4
y = 1
a = x & y
b = x | y
c = ~x
d = x ^ 5
e = x >> 2
f = x << 2
print(a, b, c, d, e, f)
0 5 -5 1 1 16
Exercise 1
What is the output of the following snippet?
x = 1
y = 0
z = ((x == y) and (x == y)) or not(x == y)
print(not(z))
False
Exercise 2
What is the output of the following snippet?
x = 4
y = 1
a = x & y
b = x | y
c = ~x
d = x ^ 5
e = x >> 2
f = x << 2
print(a, b, c, d, e, f)
0 5 -5 1 1 16
What if you could just number them? And then say: give me the value number 2; assign the value number 15; increase the value number 10000.
We'll show you how to declare such multi-value variables. We'll do this with the example we just suggested. We'll write a program that sorts a sequence of numbers. We won't be particularly ambitious - we'll assume that there are exactly five numbers.
Let's create a variable called numbers; it's assigned with not just one number, but is filled with a list consisting of five values (note: the list starts with an open square bracket and ends with a closed square bracket; the space between the brackets is filled with five numbers separated by commas).
numbers = [10, 5, 7, 2, 1]
Let's say the same thing using adequate terminology: numbers is a list consisting of five values, all of them numbers. We can also say that this statement creates a list of length equal to five (as in there are five elements inside it).
The elements inside a list may have different types. Some of them may be integers, others floats, and yet others may be lists.
Python has adopted a convention stating that the elements in a list are always numbered starting from zero. This means that the item stored at the beginning of the list will have the number zero. Since there are five elements in our list, the last of them is assigned the number four. Don't forget this.
You'll soon get used to it, and it'll become second nature.
Before we go any further in our discussion, we have to state the following: our list is a collection of elements, but each element is a scalar.
Indexing lists
How do you change the value of a chosen element in the list?
Let's assign a new value of 111 to the first element in the list. We do it this way:
numbers = [10, 5, 7, 2, 1]
print("Original list content:", numbers) # printing original list content
numbers[0] = 111
print("New list content: ", numbers) # current list content
And now we want the value of the fifth element to be copied to the second element - can you guess how to do it?
numbers = [10, 5, 7, 2, 1]
print("Original list content:", numbers) # printing original list content
numbers[0] = 111
print("\nPrevious list content:", numbers) # printing previous list content
numbers[1] = numbers[4] # copying value of the fifth element to the second
print("New list content:", numbers) # printing current list content
The value inside the brackets which selects one element of the list is called an index, while the operation of selecting an element from the list is known as indexing.
We're going to use the print() function to print the list content each time we make the changes. This will help us follow each step more carefully and see what's going on after a particular list modification.
Note: all the indices used so far are literals. Their values are fixed at runtime, but any expression can be the index, too. This opens up lots of possibilities.
Accessing list content
Each of the list's elements may be accessed separately. For example, it can be printed:
print(numbers[0]) # accessing the list's first element
Assuming that all of the previous operations have been completed successfully, the snippet will send 111 to the console.
As you can see in the editor, the list may also be printed as a whole - just like here:
print(numbers) # printing the whole list
As you've probably noticed before, Python decorates the output in a way that suggests that all the presented values form a list. The output from the example snippet above looks like this:
[111, 1, 7, 2, 1]
The len() function
The length of a list may vary during execution. New elements may be added to the list, while others may be removed from it. This means that the list is a very dynamic entity.
If you want to check the list's current length, you can use a function named len() (its name comes from length).
The function takes the list's name as an argument, and returns the number of elements currently stored inside the list (in other words - the list's length).
Removing elements from a list
Any of the list's elements may be removed at any time - this is done with an instruction named del (delete). Note: it's an instruction, not a function.
You have to point to the element to be removed - it'll vanish from the list, and the list's length will be reduced by one.
Look at the snippet below. Can you guess what output it will produce? Run the program in the editor and check.
del numbers[1]
print(len(numbers))
print(numbers)
You can't access an element which doesn't exist - you can neither get its value nor assign it a value. Both of these instructions will cause runtime errors now:
print(numbers[4])
numbers[4] = 1
Add the snippet above after the last line of code in the editor, run the program and check what happens.
Note: we've removed one of the list's elements - there are only four elements in the list now. This means that element number four doesn't exist.
Negative indices are legal
It may look strange, but negative indices are legal, and can be very useful.
An element with an index equal to -1 is the last one in the list.
print(numbers[-1])
The example snippet will output 1. Run the program and check.
Similarly, the element with an index equal to -2 is the one before last in the list.
print(numbers[-2])
The example snippet will output 2.
The last accessible element in our list is numbers[-4] (the first one) - don't try to go any further!
Functions vs. methods
A method is a specific kind of function - it behaves like a function and looks like a function, but differs in the way in which it acts, and in its invocation style.
A function doesn't belong to any data - it gets data, it may create new data and it (generally) produces a result.
A method does all these things, but is also able to change the state of a selected entity.
A method is owned by the data it works for, while a function is owned by the whole code.
This also means that invoking a method requires some specification of the data from which the method is invoked.
It may sound puzzling here, but we'll deal with it in depth when we delve into object-oriented programming.
In general, a typical function invocation may look like this:
result = function(arg)
The function takes an argument, does something, and returns a result.
A typical method invocation usually looks like this:
result = data.method(arg)
Note: the name of the method is preceded by the name of the data which owns the method. Next, you add a dot, followed by the method name, and a pair of parenthesis enclosing the arguments.
The method will behave like a function, but can do something more - it can change the internal state of the data from which it has been invoked.
Adding elements to a list: append() and insert()
A new element may be glued to the end of the existing list:
list.append(value)
Such an operation is performed by a method named append(). It takes its argument's value and puts it at the end of the list which owns the method.
The list's length then increases by one.
The insert() method is a bit smarter - it can add a new element at any place in the list, not only at the end.
list.insert(location, value)
It takes two arguments:
- the first shows the required location of the element to be inserted; note: all the existing elements that occupy locations to the right of the new element (including the one at the indicated position) are shifted to the right, in order to make space for the new element;
- the second is the element to be inserted.
Look at the code in the editor. See how we use the append() and insert() methods. Pay attention to what happens after using insert(): the former first element is now the second, the second the third, and so on.
Add the following snippet after the last line of code in the editor:numbers.insert(1, 333)
Print the final list content to the screen and see what happens. The snippet above snippet inserts 333 into the list, making it the second element. The former second element becomes the third, the third the fourth, and so on.
Adding elements to a list: continued
You can start a list's life by making it empty (this is done with an empty pair of square brackets) and then adding new elements to it as needed.
Take a look at the snippet in the editor. Try to guess its output after the for loop execution. Run the program to check if you were right.
It'll be a sequence of consecutive integer numbers from 1 (you then add one to all the appended values) to 5.
We've modified the snippet a bit:
myList = [] # creating an empty list
for i in range(5):
myList.insert(0, i + 1)
print(myList)
what will happen now? Run the program and check if this time you were right, too.
You should get the same sequence, but in reverse order (this is the merit of using the insert() method).
Making use of lists
The for loop has a very special variant that can process lists very effectively - let's take a look at that.
Let's assume that you want to calculate the sum of all the values stored in the myList list.
You need a variable whose sum will be stored and initially assigned a value of 0 - its name will be total. (Note: we're not going to name it sum as Python uses the same name for one of its built-in functions - sum(). Using the same name would generally be considered a bad practice.) Then you add to it all the elements of the list using the for loop. Take a look at the snippet in the editor.
Let's comment on this example:
- the list is assigned a sequence of five integer values;
- the
i variable takes the values 0, 1, 2, 3, and 4, and then it indexes the list, selecting the subsequent elements: the first, second, third, fourth and fifth; - each of these elements is added together by the
+= operator to the total variable, giving the final result at the end of the loop; - note the way in which the
len() function has been employed - it makes the code independent of any possible changes in the list's content.
The second face of the for loop
But the for loop can do much more. It can hide all the actions connected to the list's indexing, and deliver all the list's elements in a handy way.
This modified snippet shows how it works:
myList = [10, 1, 8, 3, 5]
total = 0
for i in myList:
total += i
print(total)
What happens here?
- the
for instruction specifies the variable used to browse the list (i here) followed by the in keyword and the name of the list being processed (myList here) - the
i variable is assigned the values of all the subsequent list's elements, and the process occurs as many times as there are elements in the list; - this means that you use the
i variable as a copy of the elements' values, and you don't need to use indices; - the
len() function is not needed here, either.
Lists in action
Let's leave lists aside for a short moment and look at one intriguing issue.
Imagine that you need to rearrange the elements of a list, i.e., reverse the order of the elements: the first and the fifth as well as the second and fourth elements will be swapped. The third one will remain untouched.
Question: how can you swap the values of two variables?
Take a look at the snippet:
variable1 = 1
variable2 = 2
variable2 = variable1
variable1 = variable2
If you do something like this, you would lose the value previously stored in variable2. Changing the order of the assignments will not help. You need a third variable that serves as an auxiliary storage.
This is how you can do it:
variable1 = 1
variable2 = 2
auxiliary = variable1
variable1 = variable2
variable2 = auxiliary
Python offers a more convenient way of doing the swap - take a look:
variable1 = 1
variable2 = 2
variable1, variable2 = variable2, variable1
Lists in action
Now you can easily swap the list's elements to reverse their order:
myList = [10, 1, 8, 3, 5]
myList[0], myList[4] = myList[4], myList[0]
myList[1], myList[3] = myList[3], myList[1]
print(myList)
Run the snippet. Its output should look like this:
[5, 3, 8, 1, 10]
It looks fine with five elements.
Will it still be acceptable with a list containing 100 elements? No, it won't.
Can you use the for loop to do the same thing automatically, irrespective of the list's length? Yes, you can.
This is how we've done it:
myList = [10, 1, 8, 3, 5]
length = len(myList)
for i in range(length // 2):
myList[i], myList[length - i - 1] = myList[length - i - 1], myList[i]
print(myList)
Note:
- we've assigned the
length variable with the current list's length (this makes our code a bit clearer and shorter) - we've launched the
for loop to run through its body length // 2 times (this works well for lists with both even and odd lengths, because when the list contains an odd number of elements, the middle one remains untouched) - we've swapped the ith element (from the beginning of the list) with the one with an index equal to
(length - i - 1) (from the end of the list); in our example, for i equal to 0 the (l - i - 1) gives 4; for i equal to 1, it gives 3 - this is exactly what we needed.
Key takeaways
1. The list is a type of data in Python used to store multiple objects. It is an ordered and mutable collection of comma-separated items between square brackets, e.g.:
myList = [1, None, True, "I am a string", 256, 0]
2. Lists can be indexed and updated, e.g.:
myList = [1, None, True, 'I am a string', 256, 0]
print(myList[3]) # outputs: I am a string
print(myList[-1]) # outputs: 0
myList[1] = '?'
print(myList) # outputs: [1, '?', True, 'I am a string', 256, 0]
myList.insert(0, "first")
myList.append("last")
print(myList) # outputs: ['first', 1, '?', True, 'I am a string', 256, 0, 'last']
3. Lists can be nested, e.g.: myList = [1, 'a', ["list", 64, [0, 1], False]].
You will learn more about nesting in module 3.1.7 - for the time being, we just want you to be aware that something like this is possible, too.
4. List elements and lists can be deleted, e.g.:
myList = [1, 2, 3, 4]
del myList[2]
print(myList) # outputs: [1, 2, 4]
del myList # deletes the whole list
Again, you will learn more about this in module 3.1.6 - don't worry. For the time being just try to experiment with the above code and check how changing it affects the output.
5. Lists can be iterated through using the for loop, e.g.:
myList = ["white", "purple", "blue", "yellow", "green"]
for color in myList:
print(color)
6. The len() function may be used to check the list's length, e.g.:
myList = ["white", "purple", "blue", "yellow", "green"]
print(len(myList)) # outputs 5
del myList[2]
print(len(myList)) # outputs 4
7. A typical function invocation looks as follows: result = function(arg), while a typical method invocation looks like this:result = data.method(arg).
Exercise 1
What is the output of the following snippet?
lst = [1, 2, 3, 4, 5]
lst.insert(1, 6)
del lst[0]
lst.append(1)
print(lst)
[6, 2, 3, 4, 5, 1]
Exercise 2
What is the output of the following snippet?
lst = [1, 2, 3, 4, 5]
lst2 = []
add = 0
for number in lst:
add += number
lst2.append(add)
print(lst2)
[1, 3, 6, 10, 15]
Exercise 3
What happens when you run the following snippet?
lst = []
del lst
print(lst)
NameError: name 'lst' is not defined
Exercise 4
What is the output of the following snippet?
lst = [1, [2, 3], 4]
print(lst[1])
print(len(lst))
[2, 3]
3
The bubble sort
Now that you can effectively juggle the elements of lists, it's time to learn how to sort them. Many sorting algorithms have been invented so far, which differ a lot in speed, as well as in complexity. We are going to show you a very simple algorithm, easy to understand, but unfortunately not too efficient, either. It's used very rarely, and certainly not for large and extensive lists.
Let's say that a list can be sorted in two ways:
- increasing (or more precisely - non-decreasing) - if in every pair of adjacent elements, the former element is not greater than the latter;
- decreasing (or more precisely - non-increasing) - if in every pair of adjacent elements, the former element is not less than the latter.
In the following sections, we'll sort the list in increasing order, so that the numbers will be ordered from the smallest to the largest.
Here's the list:
8 10 6 2 4
We'll try to use the following approach: we'll take the first and the second elements and compare them; if we determine that they're in the wrong order (i.e., the first is greater than the second), we'll swap them round; if their order is valid, we'll do nothing. A glance at our list confirms the latter - the elements 01 and 02 are in the proper order, as in 8 < 10.
Now look at the second and the third elements. They're in the wrong positions. We have to swap them:
8 6 10 2 4
We go further, and look at the third and the fourth elements. Again, this is not what it's supposed to be like. We have to swap them:
8 6 2 10 4
Now we check the fourth and the fifth elements. Yes, they too are in the wrong positions. Another swap occurs:
8 6 2 4 10
The first pass through the list is already finished. We're still far from finishing our job, but something curious has happened in the meantime. The largest element, 10, has already gone to the end of the list. Note that this is the desired place for it. All the remaining elements form a picturesque mess, but this one is already in place.
Now, for a moment, try to imagine the list in a slightly different way - namely, like this:
10 4 2 6 8
Look - 10 is at the top. We could say that it floated up from the bottom to the surface, just like the bubble in a glass of champagne. The sorting method derives its name from the same observation - it's called a bubble sort.
Now we start with the second pass through the list. We look at the first and second elements - a swap is necessary:
6 8 2 4 10
Time for the second and third elements: we have to swap them too:
6 2 8 4 10
Now the third and fourth elements, and the second pass is finished, as 8 is already in place:
6 2 4 8 10
We start the next pass immediately. Watch the first and the second elements carefully - another swap is needed:
2 6 4 8 10
Now 6 needs to go into place. We swap the second and the third elements:
2 4 6 8 10
The list is already sorted. We have nothing more to do. This is exactly what we want.
As you can see, the essence of this algorithm is simple: we compare the adjacent elements, and by swapping some of them, we achieve our goal.
Let's code in Python all the actions performed during a single pass through the list, and then we'll consider how many passes we actually need to perform it. We haven't explained this so far, and we'll do that a little later.
Sorting a list
How many passes do we need to sort the entire list?
We solve this issue in the following way: we introduce another variable; its task is to observe if any swap has been done during the pass or not; if there is no swap, then the list is already sorted, and nothing more has to be done. We create a variable named swapped, and we assign a value of False to it, to indicate that there are no swaps. Otherwise, it will be assigned True.
myList = [8, 10, 6, 2, 4] # list to sort
for i in range(len(myList) - 1): # we need (5 - 1) comparisons
if myList[i] > myList[i + 1]: # compare adjacent elements
myList[i], myList[i + 1] = myList[i + 1], myList[i] # if we end up here it means that we have to swap the elements
You should be able to read and understand this program without any problems:
myList = [8, 10, 6, 2, 4] # list to sort
swapped = True # it's a little fake - we need it to enter the while loop
while swapped:
swapped = False # no swaps so far
for i in range(len(myList) - 1):
if myList[i] > myList[i + 1]:
swapped = True # swap occured!
myList[i], myList[i + 1] = myList[i + 1], myList[i]
print(myList)
Run the program and test it.
The bubble sort - interactive version
In the editor you can see a complete program, enriched by a conversation with the user, and allowing the user to enter and to print elements from the list: The bubble sort - final interactive version.
Python, however, has its own sorting mechanisms. No one needs to write their own sorts, as there is a sufficient number of ready-to-use tools.
We explained this sorting system to you because it's important to learn how to process a list's contents, and to show you how real sorting may work.
If you want Python to sort your list, you can do it like this:
myList = [8, 10, 6, 2, 4]
myList.sort()
print(myList)
It is as simple as that.
The snippet's output is as follows:
[2, 4, 6, 8, 10]
As you can see, all the lists have a method named sort(), which sorts them as fast as possible. You've already learned about some of the list methods before, and you're going to learn more about others very soon.
Key takeaways
1. You can use the sort() method to sort elements of a list, e.g.:
lst = [5, 3, 1, 2, 4]
print(lst)
lst.sort()
print(lst) # outputs: [1, 2, 3, 4, 5]
2. There is also a list method called reverse(), which you can use to reverse the list, e.g.:
lst = [5, 3, 1, 2, 4]
print(lst)
lst.reverse()
print(lst) # outputs: [4, 2, 1, 3, 5]
Exercise 1
What is the output of the following snippet?
lst = ["D", "F", "A", "Z"]
lst.sort()
print(lst)
['A', 'D', 'F', 'Z']
Exercise 2
What is the output of the following snippet?
a = 3
b = 1
c = 2
lst = [a, c, b]
lst.sort()
print(lst)
[1, 2, 3]
Exercise 3
What is the output of the following snippet?
a = "A"
b = "B"
c = "C"
d = " "
lst = [a, b, c, d]
lst.reverse()
print(lst)
[' ', 'C', 'B', 'A']
The inner life of lists
Now we want to show you one important, and very surprising, feature of lists, which strongly distinguishes them from ordinary variables.
We want you to memorize it - it may affect your future programs, and cause severe problems if forgotten or overlooked.
Take a look at the snippet in the editor.
The program:
- creates a one-element list named
list1; - assigns it to a new list named
list2; - changes the only element of
list1; - prints out
list2.
The surprising part is the fact that the program will output: [2], not [1], which seems to be the obvious solution.
Lists (and many other complex Python entities) are stored in different ways than ordinary (scalar) variables.
You could say that:
- the name of an ordinary variable is the name of its content;
- the name of a list is the name of a memory location where the list is stored.
Read these two lines once more - the difference is essential for understanding what we are going to talk about next.
The assignment: list2 = list1 copies the name of the array, not its contents. In effect, the two names (list1 and list2) identify the same location in the computer memory. Modifying one of them affects the other, and vice versa.
Powerful slices
Fortunately, the solution is at your fingertips - its name is the slice.
A slice is an element of Python syntax that allows you to make a brand new copy of a list, or parts of a list.
It actually copies the list's contents, not the list's name.
This is exactly what you need. Take a look at the snippet below:
list1 = [1]
list2 = list1[:]
list1[0] = 2
print(list2)
Its output is [1].
This inconspicuous part of the code described as [:] is able to produce a brand new list.
One of the most general forms of the slice looks as follows:
myList[start:end]
As you can see, it resembles indexing, but the colon inside makes a big difference.
A slice of this form makes a new (target) list, taking elements from the source list - the elements of the indices from start to end - 1.
Note: not to end but to end - 1. An element with an index equal to end is the first element which does not take part in the slicing.
Using negative values for both start and end is possible (just like in indexing).
Take a look at the snippet:
myList = [10, 8, 6, 4, 2]
newList = myList[1:3]
print(newList)
The newList list will have end - start (3 - 1 = 2) elements - the ones with indices equal to 1 and 2 (but not 3).
The snippet's output is: [8, 6]
Three-dimensional arrays
Python does not limit the depth of list-in-list inclusion. Here you can see an example of a three-dimensional array:
Imagine a hotel. It's a huge hotel consisting of three buildings, 15 floors each. There are 20 rooms on each floor. For this, you need an array which can collect and process information on the occupied/free rooms.
First step - the type of the array's elements. In this case, a Boolean value (True/False) would fit.
Step two - calm analysis of the situation. Summarize the available information: three buildings, 15 floors, 20 rooms.
Now you can create the array:
rooms = [[[False for r in range(20)] for f in range(15)] for t in range(3)]
The first index (0 through 2) selects one of the buildings; the second (0 through 14) selects the floor, the third (0 through 19) selects the room number. All rooms are initially free.
Now you can book a room for two newlyweds: in the second building, on the tenth floor, room 14:
rooms[1][9][13] = True
and release the second room on the fifth floor located in the first building:
rooms[0][4][1] = False
Check if there are any vacancies on the 15th floor of the third building:
vacancy = 0
for roomNumber in range(20):
if not rooms[2][14][roomNumber]:
vacancy += 1
The vacancy variable contains 0 if all the rooms are occupied, or the number of available rooms otherwise.
Slices - negative indices
Look at the snippet below:
myList[start:end]
To repeat:
start is the index of the first element included in the slice;end is the index of the first element not included in the slice.
This is how negative indices work with the slice:
myList = [10, 8, 6, 4, 2]
newList = myList[1:-1]
print(newList)
The snippet's output is: [8, 6, 4].
If the start specifies an element lying further than the one described by the end (from the list's beginning point of view), the slice will be empty:
myList = [10, 8, 6, 4, 2]
newList = myList[-1:1]
print(newList)
The snippet's output is: [].
Slices: continued
If you omit the start in your slice, it is assumed that you want to get a slice beginning at the element with index 0.
In other words, the slice of this form:
myList[:end]
is a more compact equivalent of:
myList[0:end]
Look at the snippet below:
myList = [10, 8, 6, 4, 2]
newList = myList[:3]
print(newList)
This is why its output is: [10, 8, 6].
Similarly, if you omit the end in your slice, it is assumed that you want the slice to end at the element with the index len(myList).
In other words, the slice of this form:
myList[start:]
is a more compact equivalent of:
myList[start:len(myList)]
Look at the following snippet:
myList = [10, 8, 6, 4, 2]
newList = myList[3:]
print(newList)
Its output is therefore: [4, 2].
Slices: continued
As we've said before, omitting both start and end makes a copy of the whole list:
myList = [10, 8, 6, 4, 2]
newList = myList[:]
print(newList)
The snippet's output is: [10, 8, 6, 4, 2].
The previously described del instruction is able to delete more than just a list's element at once - it can delete slices too:
myList = [10, 8, 6, 4, 2]
del myList[1:3]
print(myList)
Note: in this case, the slice doesn't produce any new list!
The snippet's output is: [10, 4, 2].
Deleting all the elements at once is possible too:
myList = [10, 8, 6, 4, 2]
del myList[:]
print(myList)
The list becomes empty, and the output is: [].
Removing the slice from the code changes its meaning dramatically.
Take a look:
myList = [10, 8, 6, 4, 2]
del myList
print(myList)
The del instruction will delete the list itself, not its content.
The print() function invocation from the last line of the code will then cause a runtime error.
The in and not in operators
Python offers two very powerful operators, able to look through the list in order to check whether a specific value is stored inside the list or not.
These operators are:
elem in myList
elem not in myList
The first of them (in) checks if a given element (its left argument) is currently stored somewhere inside the list (the right argument) - the operator returns True in this case.
The second (not in) checks if a given element (its left argument) is absent in a list - the operator returns True in this case.
Lists - some simple programs
Now we want to show you some simple programs utilizing lists.
The first of them tries to find the greater value in the list. Look at the code in the editor.
The concept is rather simple - we temporarily assume that the first element is the largest one, and check the hypothesis against all the remaining elements in the list.
The code outputs 17 (as expected).
The code may be rewritten to make use of the newly introduced form of the for loop:
myList = [17, 3, 11, 5, 1, 9, 7, 15, 13]
largest = myList[0]
for i in myList:
if i > largest:
largest = i
print(largest)
The program above performs one unnecessary comparison, when the first element is compared with itself, but this isn't a problem at all.
The code outputs 17, too (nothing unusual).
If you need to save computer power, you can use a slice:
myList = [17, 3, 11, 5, 1, 9, 7, 15, 13]
largest = myList[0]
for i in myList[1:]:
if i > largest:
largest = i
print(largest)
Lists - some simple programs
Now let's find the location of a given element inside a list:
myList = [1, 2, 3, 4, 5, 6, 7, 8, 9, 10]
toFind = 5
found = False
for i in range(len(myList)):
found = myList[i] == toFind
if found:
break
if found:
print("Element found at index", i)
else:
print("absent")
Note:
- the target value is stored in the
toFind variable; - the current status of the search is stored in the
found variable (True/False) - when
found becomes True, the for loop is exited.
Let's assume that you've chosen the following numbers in the lottery: 3, 7, 11, 42, 34, 49.
The numbers that have been drawn are: 5, 11, 9, 42, 3, 49.
The question is: how many numbers have you hit?
The program will give you the answer:
drawn = [5, 11, 9, 42, 3, 49]
bets = [3, 7, 11, 42, 34, 49]
hits = 0
for number in bets:
if number in drawn:
hits += 1
print(hits)
Note:
- the
drawn list stores all the drawn numbers; - the
bets list stores your bets; - the
hits variable counts your hits.
The program output is: 4.
Exercise 1
What is the output of the following snippet?
l1 = ["A", "B", "C"]
l2 = l1
l3 = l2
del l1[0]
del l2[0]
print(l3)
['C']
Exercise 2
What is the output of the following snippet?
l1 = ["A", "B", "C"]
l2 = l1
l3 = l2
del l1[0]
del l2
print(l3)
['B', 'C']
Exercise 3
What is the output of the following snippet?
l1 = ["A", "B", "C"]
l2 = l1
l3 = l2
del l1[0]
del l2[:]
print(l3)
[]
Exercise 4
What is the output of the following snippet?
l1 = ["A", "B", "C"]
l2 = l1[:]
l3 = l2[:]
del l1[0]
del l2[0]
print(l3)
['A', 'B', 'C']
Exercise 5
Insert in or not in instead of ??? so that the code outputs the expected result.
myList = [1, 2, "in", True, "ABC"]
print(1 ??? myList) # outputs True
print("A" ??? myList) # outputs True
print(3 ??? myList) # outputs True
print(False ??? myList) # outputs False
myList = [1, 2, "in", True, "ABC"]
print(1 in myList) # outputs True
print("A" not in myList) # outputs True
print(3 not in myList) # outputs True
print(False in myList) # outputs False
Lists in lists
Lists can consist of scalars (namely numbers) and elements of a much more complex structure (you've already seen such examples as strings, booleans, or even other lists in the previous Section Summary lessons). Let's have a closer look at the case where a list's elements are just lists.
We often find such arrays in our lives. Probably the best example of this is a chessboard.
A chessboard is composed of rows and columns. There are eight rows and eight columns. Each column is marked with the letters A through H. Each line is marked with a number from one to eight.
The location of each field is identified by letter-digit pairs. Thus, we know that the bottom right corner of the board (the one with the white rook) is A1, while the opposite corner is H8.
Let's assume that we're able to use the selected numbers to represent any chess piece. We can also assume that every row on the chessboard is a list.
Look at the code below:
row = []
for i in range(8):
row.append(WHITE_PAWN)
It builds a list containing eight elements representing the second row of the chessboard - the one filled with pawns (assume that WHITE_PAWN is a predefined symbol representing a white pawn).
The same effect may be achieved by means of a list comprehension, the special syntax used by Python in order to fill massive lists.
A list comprehension is actually a list, but created on-the-fly during program execution, and is not described statically.
Take a look at the snippet:
row = [WHITE_PAWN for i in range(8)]
The part of the code placed inside the brackets specifies:
- the data to be used to fill the list (
WHITE_PAWN) - the clause specifying how many times the data occurs inside the list (
for i in range(8))
Let us show you some other list comprehension examples:
Example #1:
squares = [x ** 2 for x in range(10)]
The snippet produces a ten-element list filled with squares of ten integer numbers starting from zero (0, 1, 4, 9, 16, 25, 36, 49, 64, 81)
Example #2:
twos = [2 ** i for i in range(8)]
The snippet creates an eight-element array containing the first eight powers of two (1, 2, 4, 8, 16, 32, 64, 128)
Example #3:
odds = [x for x in squares if x % 2 != 0 ]
The snippet makes a list with only the odd elements of the squares list.
Lists in lists: two-dimensional arrays
Let's also assume that a predefined symbol named EMPTY designates an empty field on the chessboard.
So, if we want to create a list of lists representing the whole chessboard, it may be done in the following way:
board = []
for i in range(8):
row = [EMPTY for i in range(8)]
board.append(row)
Note:
- the inner part of the loop creates a row consisting of eight elements (each of them equal to
EMPTY) and appends it to the board list; - the outer part repeats it eight times;
- in total, the
board list consists of 64 elements (all equal to EMPTY)
This model perfectly mimics the real chessboard, which is in fact an eight-element list of elements, all being single rows. Let's summarize our observations:
- the elements of the rows are fields, eight of them per row;
- the elements of the chessboard are rows, eight of them per chessboard.
The board variable is now a two-dimensional array. It's also called, by analogy to algebraic terms, a matrix.
As list comprehensions can be nested, we can shorten the board creation in the following way:
board = [[EMPTY for i in range(8)] for j in range(8)]
The inner part creates a row, and the outer part builds a list of rows.
Lists in lists: two-dimensional arrays - continued
Access to the selected field of the board requires two indices - the first selects the row; the second - the field number inside the row, which is de facto a column number.
Take a look at the chessboard. Every field contains a pair of indices which should be given to access the field's content:

Glancing at the figure shown above, let's set some chess pieces on the board. First, let's add all the rooks:
board[0][0] = ROOK
board[0][7] = ROOK
board[7][0] = ROOK
board[7][7] = ROOK
If you want to add a knight to C4, you do it as follows:
board[4][2] = KNIGHT
And now a pawn to E5:
board[3][4] = PAWN
Multidimensional nature of lists: advanced applications
Let's go deeper into the multidimensional nature of lists. To find any element of a two-dimensional list, you have to use two coordinates:
- a vertical one (row number)
- and a horizontal one (column number).
Imagine that you develop a piece of software for an automatic weather station. The device records the air temperature on an hourly basis and does it throughout the month. This gives you a total of 24 × 31 = 744 values. Let's try to design a list capable of storing all these results.
First, you have to decide which data type would be adequate for this application. In this case, a float would be best, since this thermometer is able to measure the temperature with an accuracy of 0.1 ℃.
Then you take an arbitrary decision that the rows will record the readings every hour on the hour (so the row will have 24 elements) and each of the rows will be assigned to one day of the month (let's assume that each month has 31 days, so you need 31 rows). Here's the appropriate pair of comprehensions (h is for hour, d for day):
temps = [[0.0 for h in range(24)] for d in range(31)]
The whole matrix is filled with zeros now. You can assume that it's updated automatically using special hardware agents. The thing you have to do is to wait for the matrix to be filled with measurements.
Now it's time to determine the monthly average noon temperature. Add up all 31 readings recorded at noon and divide the sum by 31. You can assume that the midnight temperature is stored first. Here's the relevant code:
temps = [[0.0 for h in range(24)] for d in range(31)]
#
# the matrix is magically updated here
#
total = 0.0
for day in temps:
total += day[11]
average = total / 31
print("Average temperature at noon:", average)
Note: the day variable used by the for loop is not a scalar - each pass through the temps matrix assigns it with the subsequent rows of the matrix; hence, it's a list. It has to be indexed with 11 to access the temperature value measured at noon.
Now find the highest temperature during the whole month - see the code:
temps = [[0.0 for h in range(24)] for d in range(31)]
#
# the matrix is magically updated here
#
highest = -100.0
for day in temps:
for temp in day:
if temp > highest:
highest = temp
print("The highest temperature was:", highest)
Note:
- the
day variable iterates through all the rows in the temps matrix; - the
temp variable iterates through all the measurements taken in one day.
Now count the days when the temperature at noon was at least 20 ℃:
temps = [[0.0 for h in range(24)] for d in range(31)]
#
# the matrix is magically updated here
#
hotDays = 0
for day in temps:
if day[11] > 20.0:
hotDays += 1
print(hotDays, "days were hot.")
Three-dimensional arrays
Python does not limit the depth of list-in-list inclusion. Here you can see an example of a three-dimensional array:
Imagine a hotel. It's a huge hotel consisting of three buildings, 15 floors each. There are 20 rooms on each floor. For this, you need an array which can collect and process information on the occupied/free rooms.
First step - the type of the array's elements. In this case, a Boolean value (True/False) would fit.
Step two - calm analysis of the situation. Summarize the available information: three buildings, 15 floors, 20 rooms.
Now you can create the array:
rooms = [[[False for r in range(20)] for f in range(15)] for t in range(3)]
The first index (0 through 2) selects one of the buildings; the second (0 through 14) selects the floor, the third (0 through 19) selects the room number. All rooms are initially free.
Now you can book a room for two newlyweds: in the second building, on the tenth floor, room 14:
rooms[1][9][13] = True
and release the second room on the fifth floor located in the first building:
rooms[0][4][1] = False
Check if there are any vacancies on the 15th floor of the third building:
vacancy = 0
for roomNumber in range(20):
if not rooms[2][14][roomNumber]:
vacancy += 1
The vacancy variable contains 0 if all the rooms are occupied, or the number of available rooms otherwise.
Key takeaways
1. List comprehension allows you to create new lists from existing ones in a concise and elegant way. The syntax of a list comprehension looks as follows:
[expression for element in list if conditional]
which is actually an equivalent of the following code:
for element in list:
if conditional:
expression
Here's an example of a list comprehension - the code creates a five-element list filled with with the first five natural numbers raised to the power of 3:
cubed = [num ** 3 for num in range(5)]
print(cubed) # outputs: [0, 1, 8, 27, 64]
2. You can use nested lists in Python to create matrices (i.e., two-dimensional lists). For example:
# A four-column/four-row table - a two dimensional array (4x4)
table = [[":(", ":)", ":(", ":)"],
[":)", ":(", ":)", ":)"],
[":(", ":)", ":)", ":("],
[":)", ":)", ":)", ":("]]
print(table)
print(table[0][0]) # outputs: ':('
print(table[0][3]) # outputs: ':)'
3. You can nest as many lists in lists as you want, and therefore create n-dimensional lists, e.g., three-, four- or even sixty-four-dimensional arrays. For example:
# Cube - a three-dimensional array (3x3x3)
cube = [[[':(', 'x', 'x'],
[':)', 'x', 'x'],
[':(', 'x', 'x']],
[[':)', 'x', 'x'],
[':(', 'x', 'x'],
[':)', 'x', 'x']],
[[':(', 'x', 'x'],
[':)', 'x', 'x'],
[':)', 'x', 'x']]]
print(cube)
print(cube[0][0][0]) # outputs: ':('
print(cube[2][2][0]) # outputs: ':)'
Hi. I’m Programmer and tutor. I’m youtuber. I’m Creative Art Director, Web Designer, UI/UX Designer, Interaction Designer, Industrial Designer, Web Developer, Business Enthusiast, StartUp Enthusiast, Speaker, Writer and Photographer. Inspired to make things looks better.

0 comments:
Post a Comment